
Project Management
A project is a top-level container that contains artifacts needed for automating the test cases. The artifacts are objects, tasks, test scenarios, and many more.
During Qualitia installation, an initial user having the Admin role is created. Through this initial user credentials, you need to create new projects or create admin users who can create projects.
The Administrator using the Project screen can create projects and edit project details based on the project requirements.
For instructions on how to configure your project settings, refer to Configuring the Project Settings.
Creating a Project
You can create new projects and add users with different roles to them.
Important Notice
Only administrators can create new projects.
In case you are using Bitbucket (GIT) as the version control tool, then create a project branch in the Bitbucket repository before creating a project in Qualitia.
For more information about creating a branch in Bitbucket repository, refer to the links mentioned below:
If you are using Git bash, /wiki/spaces/QAS8/pages/1381632263.
If you are using SourceTree, /wiki/spaces/QAS8/pages/1381632176.
To create a project:
From the Expand Menu, click Project Management.
In the left pane. click the Add Project button (

).
From the Project Type drop-down list, select one of the following project type:
Web/Mobile Project : To create a project to automate testing for web and mobile applications.
Desktop Project: To create a project to automate testing for desktop applications.
Salesforce Project: To create a project to automate testing on a SFDC application along with its associated web and mobile applications.
Enter a Project Name and a Description.
Perform this step only if you are adding a desktop project and want to map it with a tsr file.
Click the Browse (...) button next to the Global TSR Path, and then locate and select the tsr file.
Unless you map a desktop project with a tsr file, you cannot use OR objects in the project. For more information on OR objects, refer to Working with OR Objects.(Optional) Select the Design Studio Integration checkbox to integrate the project with a Qualitia Design Studio project and perform the following steps.
Click Create.
Under Connect with Design Studio
Enter the Qualitia Design Studio URL.
Enter your Qualitia Design Studio Username and Password.
Expand Sync with Design Studio Project to select an appropriate Qualitia Design Studio Project and click Sync.
The following relevant project artifacts of the Qualitia Design Studio project along with their counts appear:Issue Types
Issues
Objects
Tasks
Test Cases
Click Finish.
Click Create.
After you create a project, you need to assign existing users. For more information, refer to Assigning Users to a Project
Editing a Project
Only administrators can edit the project details that include marking a project as Active or Inactive.
You cannot edit the name of a project, but edit its description.
You can activate or deactivate the project.
To edit a project:
From the Expand Menu, click Project.
Select the project that you want to edit.
In the main pane, click the Edit Project button (

).
The Edit screen is displayed.Edit the Description as required.
If necessary, select or clear the Active checkbox to change the project status.
Perform this step only if you are editing a desktop project and want to map it with a tsr file.
Click the Browse (...) button next to the Global TSR Path, and then locate and select the tsr file.
Unless you map a desktop project with a tsr file, you cannot use OR objects in the project. For more information on OR objects, refer to Working with OR Objects.Click OK to save the changes you made to the project.
Assigning Users to a Project
You can assign existing users to a project.
Note: Only project administrators can assign users.
To assign users to a project:
From the Expand Menu, click Project.
In the left pane, click the appropriate project.
Under Assigned Users, click Manage User.
From the User ID drop-down list, select a user.
From the Role drop-down list, select a role for the user. For more information on Roles, refer to Adding a Role.
Click the Plus sign button (

) to add another user.
After you are done adding all the users, click Add.
If this project is connected to a Version Control Management tool, then you have to add the users to the Version Control Management tool too. Otherwise, they cannot access the project.
Removing Users from a Project
In Qualitia, the Administrator can remove a user from a project if the user is no longer required for that project or if the user is allocated to other projects. You ensure security of a project by removing the users who are no longer required for the project.
In Qualitia, using Project screen, the Administrator can remove a user from a project.
To remove users from a project:
From the Expand Menu, click Project.
In the left pane, click the appropriate project.
Under Assigned Users, click Manage User.
Select the checkbox present in front of the user you want to remove. You can select multiple users at a time.
Click the Cross sign button (

) to remove the user.
Best Practices for Project Backup and Restore
Qualitia Automation Studio creates the following databases in the selected database management system (MySQL or SQL Server):
A Master Database that serves as an anchor for all the projects.
A Project Database for every project, which stores the associated project artifacts. Every Project Database is named as Projectname_projectdb.
A Result Database for every project, which stores the results for all the test suite executions. Every Result Database is named as Projectname_resultdb.
Best Practices
Qualitia recommends the following best practices for project backup and restore.
Integrate your project with a version control tool (SVN or Git).
Backup the database, GIT/SVN, custom actions, and reports daily.
Ensure that you perform the following actions while backing up a Qualitia project:
Back up the database, custom actions, reports, and SVN/GIT at the same time so that all the artifacts are in the same state and are synchronized with each other.
Ensure that no user is working while backing up the project.
Tip: Stop the Qualitia license server temporarily to stop the users from using Qualitia.Back up the constraints and triggers for the following databases:
Master Database
Project Database
Reports Database
Back up the Results folder from the Qualitia Server, which stores the Realtime Reporting data.
If you do not use a version control tool, ensure that you back up the following folders for every project:
Project Path, which stores the test cases and tasks as XML files.
Custom Action Repository Path, which stores the custom actions.
Note: To know the location of these folders, from the Expand menu, click Settings >Project Settings. The location of these folders might differ for every project.
Back up the TFS folders from Qualitia Server for the projects that are integrated with the TFS/Azure DevOps projects
Similarly, while restoring a Qualitia project, ensure that you restore the constraints and triggers for the following databases:
Master Database
Project Database
Reports Database
Note: If you restore a project without restoring its constraints and triggers, then after the project is restored, the object creation fails.
Before upgrading the Qualitia Automation Studio to a higher version, backup all the projects and follow all the best practices recommended for backing up and restoring the projects.
Save As Project
The "Save as Project" feature of Qualitia allows you to create a new project from an existing project by copying over the desired existing test cases, tasks and custom actions to the new project.
You can now reuse the test cases, tasks, and objects required for every new project in Qualitia by simply using the Save As Project feature.
Key Points to know when working with the Save As Project Feature
Following is the list of some important points to be considered before you perform Save As operation for projects.
Save As operation is possible only on local system and cannot be performed across multiple servers.
Projects that are enabled for Qualitia Design Studio integration cannot be used as Source or Destination projects when performing Save As operation.
Test data conflicts will not be checked.
Data changes are not copied if test cases do not have changes.
Save As supports copying only development artifacts. Execution artifacts cannot be copied using the Save As project method. You must create suites manually.
Test cases cannot be copied without scenarios. Copying a test case copies its associated scenarios as well.
Make sure you copy the custom actions from the source project to the target project before performing any Save As project operation.
In case your target project does not have custom actions imported, you may refer to the Importing Existing Custom Actions into Qualitia section.Save As operation on custom actions does not work on parameter name differences. A check is performed on the action name, parameter count, function name, and Qualitia class.
Environment variables used within the test data cannot be copied as a part of the Save As process.
The custom action files from the source project do not move automatically to the target project. You need to manually move the dependent jars and Custom Action Function code associated with the Custom Actions (keywords) that were selected during Save As process.
Custom action code is not copied as a part of Save As operation. It is expected that you check-in the code into the version control system so that it is available to all other users. Other users need to ensure that the code for custom actions is checked out on to the local system and the appropriate path for custom actions is specified in the .config file.
To ensure that the Target Project can use environment variables, use the following steps:
If the Target Project is new (there are no environment variables by default), do the following:
Navigate to the Source Project folder on the system.
Copy the environment variables folder having the related XML.
Paste into Target Project location on the system; example, location can be - C:\Qualitia\projectdb_folder\Environment variables.
If the Target Project already exists and has some environment variables, do the following:
Open the EnvironmentVariables.xml in the Source Project and Target Project folders.
Append the Target Project EnvironmentVariables.xml file manually with the environment variables from Source Project.
Based on the version control tool you are using, create new branch or add new folder into the remote repository.
Additional Points for Desktop Projects
You cannot use SaveAs feature for moving project artifacts from a desktop project to a web/mobile project and vice-versa.
There must be more than two desktop projects.
You must perform the SaveAs feature process in the following sequence:
Create a blank target project without mapping it to a tsr file.
Perform the Save As operation from the source project.
After the Save As operation completes, map the tsr fie path of the source project to the target project.
If you map a tsr file with the Target project before performing the Save As operation on the source project, then except for the custom actions, the other test artefacts are not imported.
Copying Qualitia Project
The key features of Save As are mentioned below:
A user having the Product Administration privilege can perform the Save As project operation. By default, an Admin user has this privilege. A user having this privilege can also be created explicitly.
You can reuse Qualitia artifacts namely Test Cases, Tasks, Objects , and Custom Actions in the following manner:
Save the Qualitia Project artifacts to a new empty Qualitia Project.
Save the Qualitia Project artifacts to a Qualitia Project with existing artifacts.
You can filter the Save As view on:
Artifact types – Test cases, Tasks, Custom Actions.
Change status of the artifact – available for copy, copied but never changed, copied but changed, and all.
You can select all artifacts or specific artifacts using selection checkboxes.
You can preview the results of the Save As activity being performed. The preview report will display the copy status for each of the artifacts being copied.
Success Status (Move to Target project): If the selected artifact to be copied is not available in the Target project, then the copy status will be displayed in GREEN with a tool tip Move to Target Project. The artifact is ready to be copied over to Target Project.
Not Copied status (Already Exists in Target Project): If the selected artifact to be copied is already present in the Target Project and no changes have been made to it, then the status will be displayed in GREY with a tool tip Already Exists in Target Project. Existing artifacts will NOT be copied over/overwritten using Save As.
Conflict Exists status (Artifact is Conflicted): If the selected artifact to be copied is already present in the Target Project and there is a conflict due to changes made to the artifacts after copy, then the status will be displayed in RED with a tool tip indicating that conflict exists and lists the possible reasons of conflict. Conflicted artifacts will NOT be copied over/overwritten using Save As.
Note: Qualitia users are required to resolve the conflicts manually.
You can save the Save As project operation report to a spreadsheet by using the Export function. The report will be exported to a pre-formatted spreadsheet. The spreadsheet report can then be saved for future reference.
Copying Qualitia Project Artifacts
Empty Qualitia project is a fresh project created through Admin > New Project tab.
Prerequisites
You must have Product Administration privilege to perform this operation.
It is mandatory to have at least two existing Qualitia Projects, one is the Source Project and the other is the empty Qualitia Project as target.
You can select the top level artifact; all the child level artifacts will automatically be marked for copy.
Example: If you select a scenario node, then all test cases in that scenario will be marked for copy via Save As project.You can select individual artifacts to save to the new project.
Example: If you select an individual test case, only the test case and its associated artifacts (tasks, objects, actions) which are used in the test case will be marked for copy.You can select individual artifacts irrespective of their association with test cases/tasks.
Example: You can filter on artifact types and select only objects to save. In this case, the custom actions, tasks, and test cases in which these objects have been used shall not be saved.If you try to navigate to another artifact type without saving, the selections will be lost.
Saving to a Blank Project
Note: Only project administrators can use Project SaveAs feature.
To Save As on a blank project:
From the Expand Menu, click Project Management.
In the left pane, click the source project.
In the main pane, click the Save As button (

).
The following confirmation message prompts that none of users are working on the source project.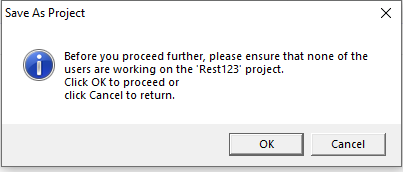
Click one of the the following buttons:
OK: To continue the saving project as process after ensuring that none of the users are working on the source project.
Cancel: To stop the saving project as process.
The Save As dialog box opens.
You can perform save as operation on the selected artifact type by using the filters available as shown in the following figure:
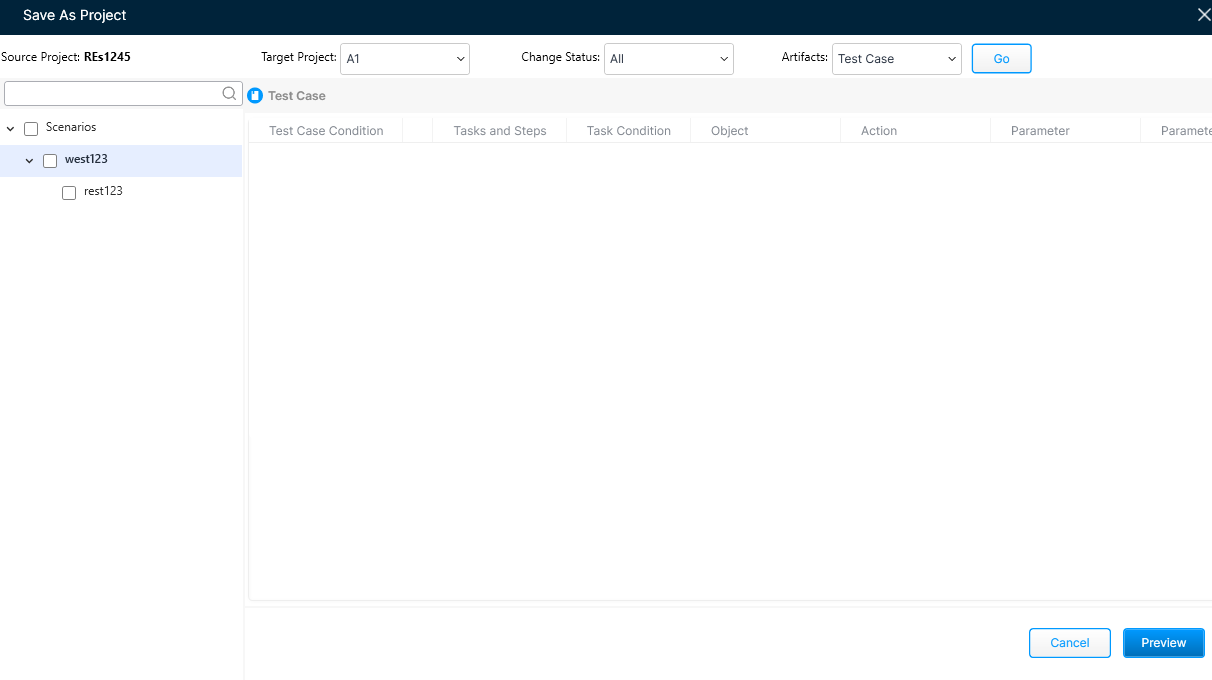
Do in the following order listed:
From the Target Project drop-down list, select a target project to which you want to copy the artifacts.
From the Change Status drop-down list, select one of the following options:
All: To select all the artifacts.
Never Moved: To select only those artifacts that were never copied to the selected target project.
Already Moved: To select only those artifacts that were already copied to the selected target project.
Changed and Moved: To select only those artifacts that after copying to the selected target project were edited in the source project.
Artifacts: You can select test case, independent task, or custom action.
After applying the filters, click Go.
If you select test case, the left pane in the dialog box shows test cases under their scenarios. When a test case is copied to the target project, the associated tasks are also copied.
Do in the following order listed:
Expand the left hand side tree to view the artifacts.
You can click a test case node to view the associated tasks on the main pane.
You can click a task node to view the status of associated objects and actions.
Click the Preview button to open the Save As Preview Report and view its results.
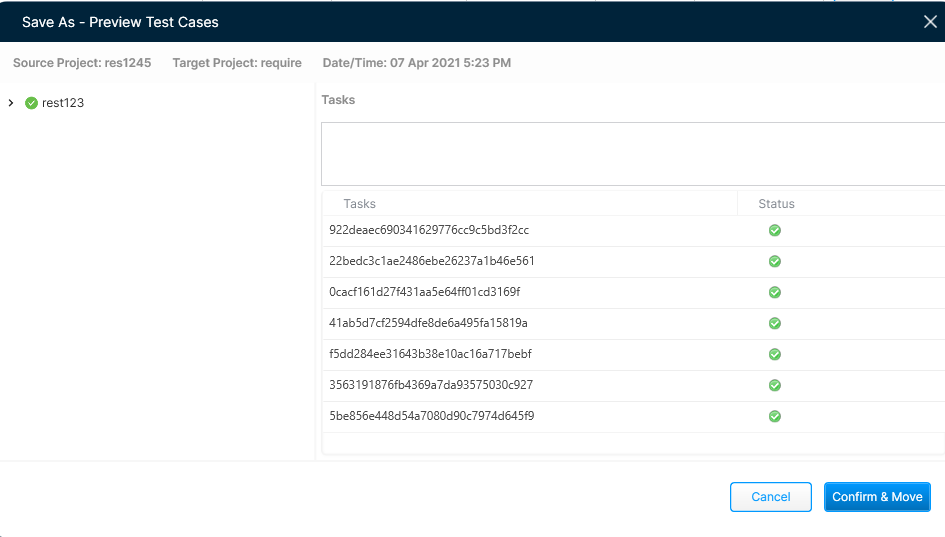
Do in the following order listed:
Expand the left hand side tree to view the artifacts.
You can click a test case node to view the associated tasks on the main pane.
You can click a task node to view the status of associated objects and actions.
The following icons denote:

denotes that the artifact can be copied.

denotes that the artifact cannot be copied as its xml file is missing in the source project.

denotes that the artifact is already copied to the target project.
Click Confirm & Move to complete the operation.
An information message appears to indicate if the operation was successful.Click Yes to export the report to a spreadsheet.
If Save As operation has found artifacts which are already existing or conflicting with the target project, then the message changes. You can export the report to a spreadsheet clicking Yes.
The spreadsheet report is displayed. You can store the report at any desired location.
Saving to an Existing Project
The following prerequisites are required in order to save Qualitia project artifacts to another Project with the existing artifacts:
You must have Product Administration privileges. It is mandatory to have at least two existing Qualitia projects; one is the Source Project and the other a Qualitia Project with existing artifacts from preview Save As operation. Also, it is mandatory that you have access to both the projects.
Incremental changes can be seamlessly saved into an existing project.
Example: Source project has been completely copied initially into an empty project. Development has continued on the Source Project and two more tasks and four objects (used in task) have been created. You can select these two tasks and individually save it to the existing target project. The objects used within the tasks get copied over automatically.
Existing artifacts with no changes in either project do not get copied over.
Example 1: Source Project has been completely copied initially into an empty project. No development has been done on the Source Project and you choose the already copied TC to be copied over again. None of the artifacts will be copied as they already exist in the target and do not have any changes.
Example 2: Source project has been completely copied initially into an empty project. Development has continued on Source Project and two more tasks and four objects (used in task) have been created and used in the TC. You can select the TC and save it to the existing project. In this case, only the newly added tasks and objects used in this TC will be copied to the target existing project since the other tasks and objects have already been copied earlier.
Artifacts with conflicts will not be copied into the target project.
Example 1: If a source task "Task1" has been copied to target project and then a change has been done in the source "Task1," (for example, a step has been added to it) and when the task is selected for copying again into the target, a conflict ensues and the source "Task1" will not get copied. If there is a conflict in any of the dependent artifacts, the root artifact does not get copied.
Example 2: If a test case is selected to be copied to a target project - if a conflict exists in the object that has been used in the task, the task will not get copied. Since the task is not copied, the test case will also not get copied. In other words, on an overall Save As level, if out of the 10 test cases to be moved, 9 are green (no conflict) and 1 is red (conflict), all the 10 test cases will not be moved.
In case there is a conflict, you need to manually resolve the conflicts and perform Save As.
In order to perform Save As on a project with existing artifacts, follow the same steps that are used to perform Save As on a blank project.
Handling Conflicts
When you use the "Save as Project" feature of Qualitia, conflicts may arise in a Test Case, Task, Objects, or Custom Actions.
Conflicts in a Test Case
The conflicts that may arise while performing a Save As on a Test Case are as follows:
The task sequence in the Source or Target Project may have been changed.
Example:
Project Source has test case "Test Case."
The "Test Case" has two tasks "Task1" and "Task2" in the sequence 1 and 2 respectively.
The "Test Case" has been copied to Target project, so the Target Project has the same test case "Test Case."
The "Test Case" has the same two tasks, "Task1" and "Task2". If the sequence of the tasks in target is changed or if OnError condition of a task is changed and Save As is performed again, then in this case the "Test Case" from source shows conflict and does not get copied to target project.
Tasks may have been added in Source or Target Project.
Example:
Project Source has test case "Test Case."
The "Test Case" has two tasks, "Task1" and "Task2."
The "Test Case" has been copied to Target Project, so it is the same test case "Test Case."
The Test Case has the same two tasks, "Task1" and "Task2" and one additional task "Task3" has been added in the Source or Target Project. If a Save As is performed again, in that case the "Test Case" from Source will not be copied to Target Project, as the Source and Target Project have the same TC but have different number of tasks.
Tasks have been deleted from the Source or Target Project.
Example:
Project Source has test case "Test Case."
The "Test Case" has two tasks - "Task1" and "Task2."
Target Project has the same test case "Test Case."
"Task2" from the Source Project has been removed/deleted. In this case, the "Test Case" from Source will not be copied to Target Project as the Source and Target Project have the same TC but one of the tasks is not present in the Source Project.
The TC Name (details) in the Source or Target Project is changed.
Example:
Project Source has test case "Test Case" and has been moved to the Target Project, so the Target Project has the same test case "Test Case."
Now the Source or the Target Test Case Name has been changed to "TestCaseNew." In this case, the Test Case from the Source will not get copied to the Target Project because though the test cases are the same, their names differ.
The scenario in the Source or Target Project is changed.
Example:
Project Source has test case "Test Case" present in Scenario A.
The Scenario A has been copied to Target Project so the Target Project has the same Scenario A having the test case "Test Case."
If the test case from Scenario A is moved to another Scenario B in the Source or Target, then conflict will occur.
If the tasks in the Source or Target Project are changed, conflicts exist in the task.
Conflicts in a Task
The conflicts that may arise while performing a Save As in a Task are as follows:
The step sequence in the Source or Target Task is changed.
Example:
"Task1" present in Source Project has three steps A, B, and C.
It has been copied to Target Project so the Target Project also has the same task with three steps as A, B, and C.
If the "Task1" step sequence is changed to say B, A, C in the Source or Target and a Save As is performed again, a conflict will occur and the task will not get copied.
Steps have been added in the Target Task.
Example:
"Task1" present in Source Project has three steps as A, B, and C.
It has been copied to Target Project so the Target Project also has the same task with three steps as A, B, and C.
If the "Task1" has one or more additional steps added in the Source or Target and a Save As is performed again for the "Task1," a conflict will occur and the task will not be copied.
Steps have been removed from the source or target task.
Example:
"Task1" present in Source Project has three steps as A, B, and C.
It has been copied to Target Project so the Target Project also has the same task with three steps as A, B, and C.
If the "Task1" has one or more steps removed in the Source or Target and a Save As is performed again for the "Task1," a conflict will occur and the task will not be copied.
The Task Name in the Source or Target Task is changed.
Example:
"Task1" present in Source Project. It has been copied to Target Project so the Target Project also has the same task.
If the name of "Task1" has been changed in the Source or Target and a Save As is performed again for "Task1," a conflict will occur and the task will not be copied.
The static data value for the step in the source or Target Task is changed.
Example:
"Task1" present in Source Project has been copied to Target Project. So the Target Project also has the same task. If the static data value for a step has been changed in the Source or Target and a Save As is performed again for "Task1," a conflict will occur and the task will not get copied.
The Objects used in the Target Task may be conflicting.
The Custom Actions in the Target Task may be conflicting.
Conflicts in Objects
The conflicts that may arise while performing a Save As on an Object are as follows:
The object details like class, property in the Source or Target may have been changed.
Example:
An object "Object 1" present in the Source Project has been copied to Target Project.
Now, if object details such as class or property are changed in the Source or Target Project and a Save As is performed again, the object will not be copied to the Target Project.
Different objects with the same name will show conflict.
Example:
If the Source Project has an object named "Obj1" with ID "123," Target also contains an object named "Obj1" but with ID "456."
The Source Object will not be copied into the Target even if these are two different objects.
Conflicts in Custom Actions
The conflicts that may arise while performing a Save As on Custom Actions are as follows:
The Custom Action details like parameter count, parameter values, Q Class, Q Function etc. in the source or target may have been changed.
Example:
Project Source has a custom action "CustKey1" and has been copied to Project Target so the Project Target now has the same custom action "CustKey1."
If the custom action properties like name, parameter count, the object class, static data values of the action have been changed in the Source or Target project and a Save As is performed again, the custom action will not be copied into the target.
Different actions with the same name will show conflict.
Example:
If Source Project has an action of name "Key1," Target also contains an action named "Key1."
The source action will not be copied into the target even if these are 2 different custom actions.
Conflicting Artifacts Causing a Roll-Up Effect
The roll-up effect of conflicts is seen when a conflict exists in an artifact which is used within test cases or tasks. In such cases, the test cases or tasks will also be set with a conflict status.
The following are the conditions of roll-up conflict situations:
An object or action has conflicts but the tasks and test cases using them have no conflicts - the tasks and test cases using the task with conflicting object or action will be displayed with a conflict status.
Note: All other tasks within the test case which have passed will appear with a success status.A task has conflicts along with the test cases using them - a task used within a test case(s) has conflicts, and then all test cases using the task will display a conflict status.
A task has conflicts but the objects/actions used within the task have no conflicts - a task has conflicts on task name, then the task will show conflicts, and objects and actions will not be displayed.
A test case has conflicts but the tasks, objects/actions used within the task have no conflicts - a test case has conflicts on test case name, then the test case will show conflicts, and tasks, objects, and actions will not be displayed.