Troubleshoot the Issues
While working with Qualitia, you may encounter certain tasks that are unexpected. Therefore, you can resolve the issues as per the symptoms observed in a quick-turnaround.
Install and Upgrade
This topic provides information on how to resolve the common issues you may encounter while installing or upgrading Qualitia Automation Studio.
How to Verify Digital Signature Manually?
Qualitia digitally signs all the executable files shared with Qualitia Setup or installable. In case system fails to verify this Digital signature, it is recommended to verify the signature using few simple steps before continuing the operation.
To verify the Digital Signature manually:
- Right-click Setup.exe and select Properties from the context-menu.
- In the Digital Signatures section, click Details.
- Ensure you see appropriate Signer Information as mentioned in the screenshot below:
This ensures that the setup.exe is safe to run in the environment.
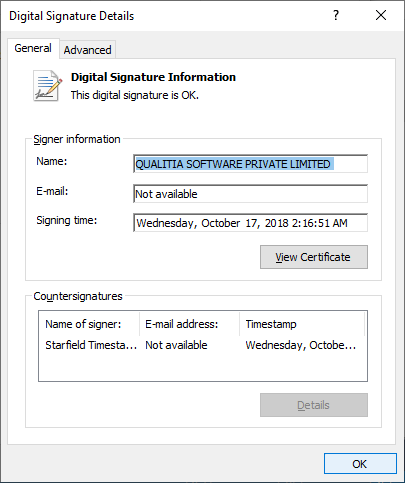
In case you find Signer Information missing, inform Qualitia Support immediately and abort the execution of such files.
"Installation is forbidden" Error While Installing the Qualitia Client
Problem: This error occurs when you try to install\update the Qualitia client as a normal user instead of running it as an administrator.
Following is the Qualitia log error:
*MSI (s) (04:4C) [17:19:18:925]: Rejecting product '{4F8DBD40-67A6-4AEE-B0CE-A66C8C39E6C9}': Non-assigned apps are disabled for non-admin users.
Info 1625. This installation is forbidden by system policy. Contact your system administrator.
C:\Users\poc\AppData\Roaming\Qualitia Software Pvt. Ltd\Qualitia Automation Studio - Client 8.4.0 8.4.0.366\install\QualitiaWDClient.msi
MSI (s) (04:4C) [17:19:47:824]: MainEngineThread is returning 1625*
Root Cause: Default Windows Installer Settings on Server OS restricts any msi file to install application on LocalAppData of the machine.
Solution: To resolve this issue, grant the Windows installation group policy by performing the following steps.
In the Group Policy Editor, navigate to Console Root > Local Computer Policy > Computer Configuration > Administrative Templates > Windows Components and locate Windows Installer.
Double-click Windows Installer.
Double-click Turn off Windows Installer. The Turn Off Windows Installer window opens.
Select Enabled.
In the Disable Windows Installer dialog box, select Never.
Finally, click OK.
Installation Has Failed or The application Could not be started.
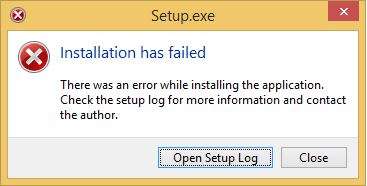
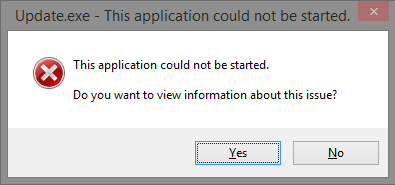
This error occurs when multiple installation processes get started or some Windows features are not enabled.
Sometimes, unzipping Setup.exe takes more than usual time due to the system specifications or some other technical problems. Users are requested to wait for some time once they double-clicked Setup.exe.
Solution:
If you face the error mentioned above, close the dialogue box.
Ensure you have Enabled .Net Framework under Windows Features.
You can confirm whether this feature is enabled using these simple steps mentioned below:
If the server machine has Windows Server OS, navigate to Server Manager > Right-click Features and select Add Features.
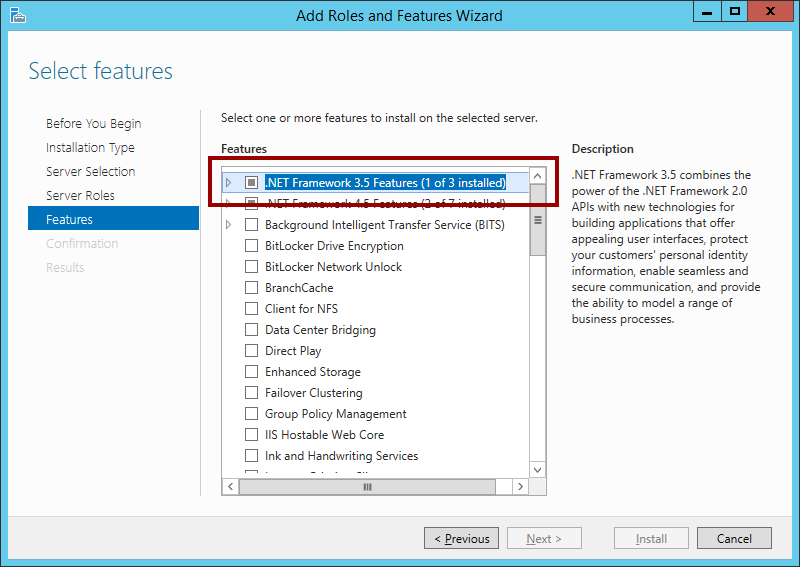
If the server machine has Windows 7 and above, navigate to Control Panel > Programs and Features > In the right pane, click Turn Windows features on or off.
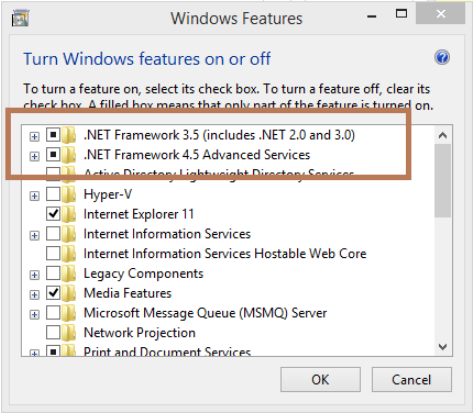
You may have to reboot the system to get the changes effective. After rebooting system, run the setup.exe again.
Case Sensitive Issues in Project Name
Description: If in the source control system (GIT and SVN), the letters of a project name change their case, then Qualitia does not allow to open the project
Solution: You need to change the project name in source control that matches with the Project directory in such a way that the case of every letter of the displayed project matches.
If you are using Qualitia version 7.2.4 or above, then a dialog box prompts which asks to change the case of Project name from the background. Unless you do not do, Qualitia does not work or not allow to open the project.
Incompatible Client Server Version
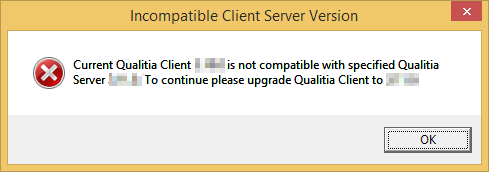
This next-generation installer handles all server and client related updates easily. Users are requested to apply updates whenever made available by team Qualitia to maintain server-client compatibility.
Solution:
If you face this error, please apply the latest update available for Qualitia Server.
Change Communication Port for Qualitia Server
By default, Qualitia Server is configured to use communication port 8889. In case this port is being used by some another application, you may change this communication port to any other available port.
To change the communication port for Qualitia Server:
- Navigate to %localappdata%\QualitiaWDServer\app-5.2.0\Server.
- Open the application.properties file.
- Update value for server.port.
- Save and close the file.
- Restart the Qualitia Server service from the Services console and continue installation.
Exception in UpgradeProjectDatabase : <Project_Name>: Too many connections
This error occurs when the number of projects is more than 50. In order to proceed with the upgrade process, you must then increase the limit of maximum connections allowed in the MySQL database settings. By default, 151 is the maximum permitted number of simultaneous client connections.
You can set this limit from where the MySQL server maintains system variables that configure its operation. System variables can be set at server startup using an option file.
Increasing Limit using Option File (Windows)
You can increase this max_connections limit Using Options File (sometimes called Configurations File).
- Navigate to C:\ProgramData\MySQL\MySQL Server 5.7 on the machine where MySQL is installed.
- Edit the my.ini file using any text editor.
- Update the value for max_connections.
- Save and Close the file.
- Restart MySQL service to get the changes affected.

Increasing Limit using Option File (Linux)
If the MySQL is installed on the Linux machine, you will find my.cnf file in the MySQL installation directory. You can update the value for max_connections in my.cnf file using any text editor.
For more information, refer to the MySQL documentation.
Installation Has Failed
This error occurs when multiple installation processes are started. Sometimes, unzipping Setup.exe takes more than usual time due to the system specifications or some other technical problems. Users are requested to wait for some time once they double-clicked Setup.exe.
Solution:
If you face the error mentioned above, close the dialogue box and double-click Setup.exe again.
Incompatible Client Server Version
This next-generation installer handles all server and client related updates easily. Users are requested to apply updates whenever made available by team Qualitia to maintain server-client compatibility.
Solution:
If you face this error, please apply the latest update available for Qualitia Server.
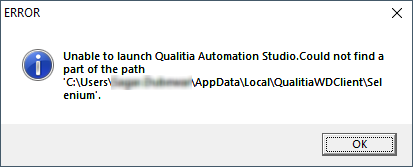
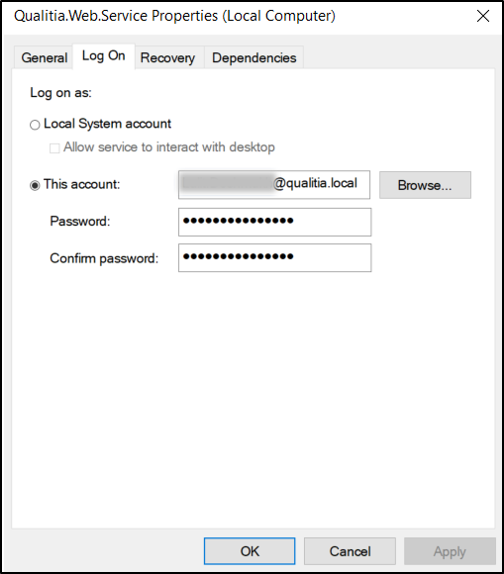
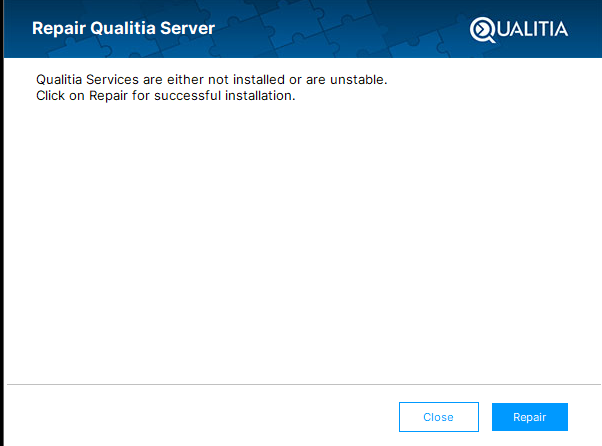
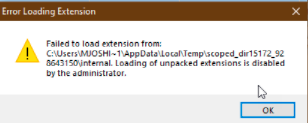
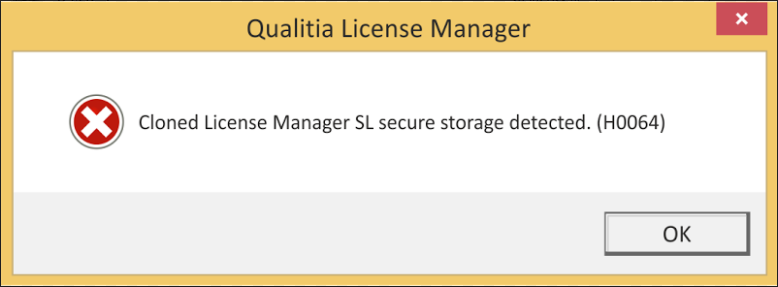
Web/Mobile Automation
This topic provides information on how to resolve the common issues you may encounter while working on web and mobile applications automation. This topic provides information about the general issues that you may see while working with Qualitia Studio. Summary: This error occurs when the Selenium folder is missing in the Qualitia installation directory. This folder consists of all the browser drivers that are required for the test case executions using different browsers. By default, this directory is created at the time of installation. The installation process may miss to create it in some specific environments. Solution: Create a new folder in the Qualitia installation directory (%localappdata%\QualitiaWDClient), name it as selenium, and try launching Qualitia again. Problem: The following error message occurs while adding a new LDAP user: The user name or password is incorrect. Root Causes: The above error may occur due to the following reasons: You are trying to add a LDAP user by accessing the Notification Server remotely. The application identified is a local account and does not have the permission to browse the Active Directory. Domain password of the user you are trying to add has expired. Solution: To resolve this issue, refer to https://knowledge.broadcom.com/external/article/151985/systemruntimeinteropservicescomexception.html . Problem: When launching Qualitia or dry running a test case or executing a test suite, Qualitia does not work and you see the following message: Solution: You must install 64-bit Java on your computer with the latest patch for Java 8. Refer to Java website. This error occurs when the Google Chrome browser and Chromedriver are not compatible. Once downloaded, open Qualitia Automation Studio, go to Setting > Local Profile > Execution Configuration. Click Browser > Chrome. In Chrome Driver Path, select the chromedriver.exe which you have downloaded & extracted for your chrome version. Click OK. Your test cases should now get executed as expected. This error occurs due to incompatible driver version of MySQL. To resolve this error, you must download and place the compatible version of MySQL driver at the specified location. To resolve this error: Unzip the file. Copy mysql-connector-java-8.0.11.jar and place it to %localappdata%\QualitiaWDClient\app-5.x.x\WebDriver\lib location on the machine where you have installed Qualitia. Navigate to %localappdata%\QualitiaWDClient\app-5.x.x\WebDriver. Edit build.xml and replace mysql-connector-java-x.x.x-bin with the new file name (i.e. mysql-connector-java-8.0.11.jar). Save and close the file. Restart Qualitia Automation Studio. Incompatible .Net Framework: Method not found: '!!0[] System.Array.Empty()' Summary: This issue occurs when .Net framework you have installed is not compatible. Qualitia Automation Studio requires minimum .Net Framework 4.6.2 installed on your system. Solution: Close the dialogue box and upgrade the .Net Framework to 4.6.2. Refer to the Prerequisites and Configurations section for more information. To determine which .Net Framework version is installed, refer to the Microsoft documentation. Problem: Suite execution gets aborted during execution for Suite with test cases having 1000 or more test steps. Reason: This issue is observed when you execute suites from different Windows client machines connected over VPN that point to a Qualitia server, which is located on a different machine. This issue occurs when the Set time automatically option on your Windows client machines is turned on and the sync time for all the Windows client machines is different. Solution: To fix this issue, perform the following steps to turn off the Set time automatically option: Open Settings on the Windows machine. Navigate to Date & time settings. Disable the Set time automatically option. Problem: While executing a suite, a “Fatal exception during execution” error is displayed. Reason: Excessive test data is sent while executing the test cases. The default heap size for Qualitia is 3.5 to 4 GB, which sometimes may not be enough for executing a suite. Solution: Increase the heap size using one of the following methods: Method 1: Open the Qualitia.exe.config file, which is located in C:\Users\{user_name}\AppData\Local\QualitiaWDClient\app-{qualitiaVersion}. Find the EngineJVMArg setting node. Edit the value of the heap size as required. For example, enter Xmx7048 to set the heap size to 7 GB. Method 2: Go to Environment Variables > System variables. Edit the _JAVA_OPTION property. Edit the value of the heap size as required. For example, enter Xmx7048 to set the heap size to 7 GB. The following table shows the error message displayed on the screen or shown in the logs. Message Description User is Inactive When the user is marked as inactive in the database. The solution is the user must be activated from the database. Invalid Password When the user has entered the wrong password. The solution is to enter the correct password or request the admin to reset a password. The Authentication has failed When the user authentication fails due to an incorrect username. No active session is mapped to the client When a user logins again, the user is not able to find any session. Could not find a client with the specified client Id When the client id is invalid. The solution is to provide the valid client Id must be provided from the configuration file. Could not find a user with the specified user Id When user Id is invalid. The solution is to enter the correct user Id. Solution: This error occurs when Qualitia is launched using the incorrect shortcut and user tries to execute the test case for Mobile web or native application. To resolve this error; create a new shortcut of Qualitia. To create a new shortcut: Remove an existing shortcut of Qualitia from Desktop. Go to %localappdata%\QualitiaWDClient\app-4.1.0. Right-click Qualitia.exe. Click Send to and select Desktop (create shortcut). Problem: Qualitia server is not responding after installation. Reason: You do not have privileges to write to <system drive>/Windows. Solution: To resolve the issue, perform the following steps: Go to the Windows Service: Right-click on the Qualitia.Web.Service service. Click Properties from the context menu. Click the Log On tab. Select the This account checkbox: Click Browse. The Select User window appears: Click Locations, select the Entire Directory option on the Locations windows, and then click OK: Enter the name of the system user you want to select and click Check Names: Enter the password in the Password and Confirm password field. Click Apply. Restart the Qualitia.Web.Service service. You should now be able to connect to the Qualitia server again from client settings. Problem: Reports and dashboards are not visible in Qualitia in Windows 11 Pro. Reason: Intel driver version is 27.20.100.89XX or older. Solution: Upgrade the driver to version 30.0.100.9684. Problem: Upon clicking the Execute tab or when restoring Qualitia database, the following message is displayed: “throws error packets larger than max_allowed-packet are not allowed”. Solution: Increase the max_allowed_packet size in the Database Server. Problem: When clicking on the Test Connection button associated with the Qualitia Server URL in the Server Configuration tab, the following error message is displayed: Cannot connect to the Qualitia Server, there might be the following reasons: Port might not be accessible. Server URL might be wrong. Qualitia Server might not be running. Summary: Qualitia Services might be unstable. Solution: You need to repair the Qualitia services that are installed on the Qualitia server. Perform the following steps: Open the computer where the Qualitia Server is installed. Double-click the Qualitia - Server icon on your desktop. Click the Repair button. Problem: The following error message is displayed when executing a test case or a test suite: Summary: This error occurs when due to certain organization security policies, Chrome disables the required Add-ons, which you can enable during the execution. Solution: To work around this issue: Open the mapped or default execution profile. Select the Browser as GoogleChrome. Select the Edit Desired Capabilities checkbox. Enter the following values: Select the custom_use_chromeoptions checkbox. Select the args checkbox, and enter the following text next to it:--disable-extentions. Select the useAutomationExtension checkbox. Click OK. Problem: If the Qualitia components (QAS client, QAS server, QAS database, QAS license server, and MOS) are on different computers, you may encounter the following error messages: Execution is failing due to incorrect URL formation. Getting an error "Original error: Failed to connect to….” when executing a test suite. Unable to connect to Qualitia server that is present on different machine than Qualitia client. Getting an error Port might not be accessible. Server URL might be wrong. Qualitia Server might not be running. Unable to connect to MOS server that is present on different machine than Qualitia client. Getting an error Port might not be accessible. Server URL might be wrong. Please ensure that MOS server is installed and the MOS service is running on the specified port. Summary: This issue occurs if the Endpoint Security and VPN settings are restricting the communication between the components. Solution: To resolve this issue, you must enable communication between the Computers as follows: All Computers must be connected over the same network. Use VPN to connect all the Computer on same network. Whitelist the following ports in the VPN. 4723 or the port number where the Appium server is running on the Macintosh Computer 21000 8887 8889 4001 Add rules to open TCP and UDP ports from the Endpoint Security Product. Ensure that both the incoming and the outgoing traffic is allowed. Ensure that you are connected to the VPN while creating rules using the Endpoint Security products. Qualitia recommends using VPN generated IP address for secure communication. For example, to execute a test suite on a different Computer, you need to specify the IP address of that Computer in the execution profile. You must refer to the documentation of your Endpoint Security product for instructions to allow communication between the Computers that contain the Qualitia components. This topic provides information about the licensing issues that you may face while working with Qualitia Licenses. Some organizations follow a practice of creating Virtual Machines (VM) with standard configurations and then clone it for different users to use. If they install Qualitia on the base image, Qualitia licensing manager may get duplicate installation id for the cloned VM. In all likelihood, the end user may receive a licensing error. It is, therefore, recommended to install Qualitia separately on the VMs after they are cloned. Problem: You may get an error message while trying to clone the machine with Qualitia Installation, as shown in the following screenshot: Solution: To resolve the issue, perform the following steps: On the Qualitia License Server, open the url: http://localhost:1947/_int_/products.html If you see following error “Disabled due to Cloning”, take the screenshot and open a support ticket. If no such error is displayed in the Qualitia License Server, restart the “Sentinal LDK License Manager” service on the server system. If the issue persists for a particular Qualitia Client system only, re-validate the settings documented here. Solution: This error occurs when the Sentinel License Manager is missing on the designated machine. Before initiating the Qualitia installation, you must first activate Qualitia license. Activating license includes installing Sentinel License Manager (haspdinst.exe). To resolve this error: Install Sentinel License Manager (haspdinst.exe). You will find this file in the Support_Packages folder shared with Qualitia Automation Studio setup. Problem: You may get an error message while trying to install Sentinel HASP, as shown in the following screenshot: Reason: Antivirus or firewall may block the Sentinel HASP. Solution: To resolve this issue, please perform the following steps: Launch the Command Prompt as an administrator. Navigate to the folder where haspdinst.exe exists. Execute haspdinst.exe. Continue the Installation Process. Solution: In case you come across this error: Ensure that the license server is up and running. Verify that the Sentinel LDK License Manager service is started on the Qualitia client machine. (To open Windows services console; press Windows R and then enter Services.msc) Restart the Sentinel LDK License Manager service using Windows services console. If the issue persists, follow the steps mentioned below: Create a file with its name in the following format - hasp_108764.ini Open this file using notepad and add the following setting in it: For Windows 7 and later versions, copy the hasp_108764.ini file to the following location: %localAppData%/SafeNet Sentinel/Sentinel LDK/ Open the url http://localhost:1947 and go to Configuration > Access to Remote License Manager, select all check boxes, add required information and then click Submit. Go to Windows services console (Press Windows R and enter services.msc to open Windows Services console). Select the service Sentinel LDK License Manager and restart it. For Verification if the license has been recognized by the license server, open the Sentinel ACC portal (http://localhost:1947) and click session to view the licenses acquired by various systems. This topic provides information about the issues that you may face while working with test data. Problem: You may encounter any of the following pop-up messages while adding the test data: Reason: The antivirus of your system has blocked the test data excel file. Solution: Open the anti-virus of your system to whitelist the QAS Client setup folder that is located at the following location: %localappdata%\QualitiaWDClient\app-8.2.XX Also, ensure that files having extensions .dll, .exe, and .JAR files are not blocked. If this issue still occurs, request the System Administrator to examine the anti-virus log file. Problem: Some task iterations are skipped. Summary: In task iterations, some iterations execute, but the remaining task iterations do not execute, or none of them execute. Solution: You need to delete the blank cells associated with the task iterations. Perform the following steps: Open the test case in which task iterations did not execute. Open its Test Data explorer. Select the blank cells of the following columns, and Press Delete from your keyboard. TCIteration Selection DataSetTag This topic provides information about the issues that you may face while working with version control systems. Problem: Unable to push any project artifact to the Git server. Summary: The following error message is displayed while pushing the project artifacts to the Git repository on the Git command prompt window: remote: “Repository not found”. fatal repository ‘<gitserverurl>’ not found. This error occurs when the Windows Credentials Manager on your computer has stored the old Git server credentials. Solution: Do one of the following: If you have access to Manage Windows Credentials of your computer Perform the following steps: From the Start menu of your computer, open Control Panel. Click User Accounts > Credential Manager > Manage Windows Credentials. Delete all the credentials associated with the Git server. After deleting the Git server credentials, push the project artifacts. If you do not have access to Manage Windows Credentials of your computer Perform the following steps: Open the command prompt. Enter the following command and hit Enter to delete the stored Git server credentials: After deleting the Git server credentials, push the project artifacts. The older version of GIT has a restriction about file path. It does not accept the files that exceed the file path and name that has more than 256 or 260 characters. To resolve this error, you can try following workarounds. Workaround 1: Update the Git version to the latest one. Workaround 2: Change Git settings by executing this command: Workaround 3: If any of the workaround mentioned above does not work or you are unable to follow these workarounds due to any permission-related issues, you can move the Qualitia project to some local drive with relatively shorter path. Moving the project to the local drive or shorter path saves some character space and may resolve the issue. Error in updating the test case, please check your access to GIT server. Git error: Too many redirects of error in authentication. This error occurs when authentication details provided under Project Settings are incorrect. To update Git/Bitbucket authentication details: In Qualitia automation studio, go to Setting > Project Settings. Update authentication details. Click OK. Restart Qualitia. This error occurs when SharpSVN is used as version control tool for the Qualitia test assets. Few SharpSVN components require Microsoft Visual C++ 2010 SP1 Redistributable package. To resolve this error, you must install Microsoft Visual C++ 2010 SP1 Redistributable package. This error usually appears when the project artifacts (tasks, test cases) from the SVN server are not accessible from Qualitia client due to one or more reasons. This situation may occur when you update project folder names on either SVN server or on the local machine. While updating the project folder names, ensure you use the same folder names at both the locations; SVN Server and local machine (Project Path). Also, these folder names are case-sensitive. This problem may appear if folder names are in different cases. This topic provides information that you may face while working with Object Spy. This error occurs when the Google Chrome browser and Chromedriver are not compatible. Once downloaded, open Qualitia Automation Studio, go to Setting > Local Profile > Execution Configuration. Click Browser > Chrome. In Chrome Driver Path, select the chromedriver.exe which you have downloaded & extracted for your chrome version. Click OK. Your test cases should now get executed as expected. Starting Qualitia Automation Studio v5.6, you can add objects using Object Spy for Google Chrome. In case you face any difficulties while adding objects using Google Chrome extension, uninstall the Qualitia Object Spy extension and reinstall it. Qualitia Object Spy is an Internet Explorer (IE) plug-in embedded within IE window at the bottom of the page. It allows you adding objects in the repository while developing test cases or tasks. You can edit the objects in case of any changes to document structure and at the same time validate changes to objects. In order to use this Object Spy tool seamlessly, user has to enable some options in Internet Explorer. Go to Settings > F12 Developer Tools > Emulation > Mode > Document Mode. Set Document Mode to Edge (Default), 8, 9, 10, or 11. Sometimes, it has been observed that Object Spy does not allow users to add new or update existing set of objects. For "Object Spy in IE" this usually happens when Enable Protected Mode is ON and Internet security is set to High or Medium High. These options are found under Internet Options in the Internet Explorer. Though we do not recommend this, however, an alternative can be to set the Enable protected mode ON and set the Internet security options to Medium. This but can have flaky behaviors here and there. Problem: If a page contains more than 50 child elements, Qulaitia Object Spy may fail intermittently to add objects using XPath. Summary: Qualitia Object Spy adds the object using a locator type other than XPath though you have specified XPath as the highest priority in the locator precedence. Solution: To work around this issue, increase the timeout from 1000 to 5000 in the pmr file. Navigate to the ChromeObjectSpyExtension folder. Open the pmr.json file. Under the "Configuration" object, set the timeout to 5000. Problem: When adding an object using an Object Spy, the following error message is displayed. "The last transaction failed. Ensure that you are connected to the database and the Qualitia server before you try this operation again." Summary: Check if the SQL Server database is connected. If there is no problem with the database connection, then the problem is with query timeout. This error occurs because the default timeout to query the database is 30 seconds. You can open the log file located at the file location: %ProgramData%\Qualitia\WD\Server\logs\app.js.log The log file contains the following text: Error while running query with SQL Server: Query Timeout:\ProgramData\Qualitia\WD\Server\logs\app.js.log Solution: To solve this issue, increase the timeout to query the database. Perform the following actions: Open the Qualitia Server Settings file. Set the value of DatabaseQueryTimeout that you want. Problem: Qualitia Automation Web Recorder does not work and shows the following message "Recorder process could not be initiated within the stipulated time(120 s). Please try starting recording again". Reason 1: AUT is not loading within 120s. Solution 1: You can check whether your application under test is taking more than 120 seconds to load. Contact Qualitia support on configuring the time-out. Reason 2: This error message is displayed as your QAS client is using Open JDK. Solution 2: Perform the following steps: Go to the client installation location folder (%LocalAppData%\QualitiaWDClient\app-8.0.x) on your computer. Open the Qualitia.exe.config file to set EngineDefaultMemory to -Xms512m, as follows: Save the file. Restart the QAS client. Problem: In the Qualitia Mobile Recorder, you might not be able to open a web application or web-view context of a hybrid application if chrome has more than 20 open tabs. Unable to switch to Mobile Web View and Loader keeps on Loading the screen. Solution: It is recommended to close all the tabs. Problem: Samsung Galaxy S9 view + is distorted in Qualitia Mobile Recorder and MOS. Solution: Do the following in the order listed: Go to the settings menu of Galaxy S9+. Under Display the Screen Resolution, set to WQHD 1440x2560. Problem: Unable to start session after selecting an application in MOS or Mobile recorder on Xcode version 11.6 or higher. Summary: The WDA bundled along with the agent does not work on Xcode version 11.6 and higher. Solution: Perform the following steps: Stop the agent. Go to Applications > MOSAgent > Right click >Show package content > Contents > MacOS. Double-click RunAgent. In the logs, find the following message using the WDA path: Copy that path and open in finder. Delete all the content inside the WDATemp folder. Download WDA v2.20.0 for your Xcode version from the following location: Extract the downloaded file, copy all the contents, and paste Open WebDriverAgent.xcodeproj in Xcode and make sure you set proper Team and check Automatically manage signing in the Signing and Capabilitiessection for WebDriverAgentLib, WebDriverAgentRunner and IntegrationApptargets. Click Product > Build for >Testing. After the build is succeeded, click Product > Build. Close Xcode. In the agent, connect to a device and select an application. Problem: The following error message "View For the device is failed. Please connect again" appears when you try to launch an emulator in an MOS Session is created with Cold Boot. Reason: This error occurs when emulator (virtual device) is created using cold boot in Android Studio. There is some security issue when trying to read snapshot if we try to cold boot a device.. Currently, we do not support an emulator that is created using a cold boot. Solution: Perform the following steps: Open Android Studio. Click Tools > AVD Manager. Click + Create Virtual Device. Select the desired device you want, and click Next. Select the desired API Level, and click Next Click Show Advanced Setting, and scroll down a bit. From the Boot Option list, select Quick Boot. Click Finish. This topic provides information about the issues that you may face while working with browsers and devices. Problem: The QAS recorder extension does not load on Chrome and Edge browser. Root Cause: The group security policies for Chrome and Edge browser are set to block the extensions from loading. Solution: To resolve this issue, you must whitelist the recorder extension ID in the group security policies. However, the extension IDs are dynamic and change for different sessions and machines. To overcome this dynamic ID issue, Qualitia has added a key in the manifest configuration file of Chromium recorder extension, which ensures that the extension ID does not change for different sessions and machines. Every time you launch the Chrome or Edge recorder, the extension ID remains the same, which is dlihcndnnidnnmhpobcpjfhepjkjigjc. You must whitelist this ID. This ID remains the same as long as the key in the manifest configuration file is not changed. This modification to fix the extension loading issue is available in Qualitia Automation Studio 8.3.2. For older releases, perform the following steps: Download the build from the following path: https://s3.console.aws.amazon.com/s3/buckets/local-it-backup?prefix=dailybuilds/QAS/release/8.1.0/8.1.0.702/. Install Qualitia Server and Client. (Refer to Installation Process for the installation steps) Navigate to the path: C:\Users\yourName\AppData\Local\QualitiaWDClient\app-8.1.0\WebDriver. Open the qualitia-8.1.0.jar file using the 7-Zip achieve method. Drag the ChromiumExtension.zip file to C:\Users\yourName\AppData\Local\QualitiaWDClient\app-8.1.0\WebDriver. Extract the zip file. Now, keep the extracted file and delete the zip file. Open the manifest.json file present in the ChromiumExtension folder. Add the following line to manifest JSON file Save and close the file. Compress all files by selecting them in the ChromiumExtension folder Rename the compressed file as ChromiumExtension. So it will read as ChromiumExtension.zip. Now repeat step 4. (Ignore this step if already jar open) Drag ChromiumExtension,zip file from folder to 7-Zip opened archieve view. On the popup window, click Yes. Restart the machine. Go to C:\Users\yourName\AppData\Local\Temp folder and delete all the files. (Click Skip if files won’t get deleted) Launch Qualitia Studio Client. Start Chrome/Edge Recorder. Open the extension manager in the Chrome/Edge browser and enable Developer Mode. Now, verify the Qualitia recorder extension ID. You may face problems in test case executions in case the Google Chrome browser and chrome driver versions are not compatible. With new versions of google chrome browsers, it is important to update the chrome drivers to run the test cases flawlessly. If the browser and driver versions are not compatible, you may get following error. In such cases, you must update the browser driver versions. You can get the correct chrome drivers here. Once downloaded, open Qualitia Automation Studio, go to Setting > Local Profile > Execution Configuration. Click Browser > Chrome. In Chrome Driver Path, select the chromedriver.exe which you have downloaded & extracted for your chrome version. Click OK. Your test cases should now get executed as expected. Starting from Qualitia Automation Studio v5.6, you can add objects using Object Spy for Google Chrome. In case you face any difficulties while adding objects using Google Chrome extension, uninstall the Qualitia Object Spy extension and reinstall it. Problem: Test case execution on a custom browser profile fails if any instance of the same browser is open. The error log of the test suite execution result contains the message “ Root Cause: In the associated execution profile, the specified Capability Profile path is common for all the browser profiles. Workaround: Close all the instances of the browser on which you want to execute the test case. Problem: The test suite execution fails on Chrome with the following message "Certificate Authority. Invalid error". Description: The certificate errors do not allow Qualitia to execute test suites. Before executing the test suite, you need to configure the mapped or default execution profile from the Qualitia client. If you are executing through the offline suite, open the Qualitia Offline Configuration Manager to select the offline suite and the mapped execution profile. Perform the following steps: Open the mapped or default execution profile. Select the Browser as GoogleChrome. Select the Edit Desired Capabilities checkbox, Select the ChromeOptions checkbox. Select the args checkbox, and enter the following text next to it: ignore-certificate-errors. Now, re-execute the test suite. This error occurs when using Qualitia with SQL server 2016 developer edition and the Authentication Mode is set as Windows Authentication. Solution: Download Microsoft JDBC Driver 6.0 for SQL Server. Unzip the file at some temporary location. Go to enu > Auth. Copy the dll depending on your OS (32 or 64-bit) version. Open the Java directory that is set under Settings>Configuration Settings. Add the dll file to lib and bin folders. If you are using jre7: Go to enu > jre7. Copy sqljdbc41 and add it to Qualitia installed location [C:\Program Files (x86)\Qualitia\Qualitia 3.14\WebDriver\lib]. If you are using jre8: Go to enu > jre8. Copy sqljdbc42 and add it to Qualitia installed location [C:\Program Files (x86)\Qualitia\Qualitia 3.14\WebDriver\lib. This topic provides information about the issues that you may face while working with actions. Problem: The DragandDropToObject action fails to drag and drop an object to the specified location. The execution report displays the associated step as Passed though no operation was performed on the object. Summary: The DragAndDropToObject action fails when the draggable attribute for the associated HTML element for the object is set to false. Solution: Modify the associated HTML element for the object to set the draggable attribute to true or auto. Problem: The OpenApplication action fails on UFT version 2021 and above. Reason: The OpenApplication action fails while launch API due to technical limitation. Solution: Use the UFT versions older than 2021. Problem: The SearchandSelect action of lookup fails while executing the recording through Qualitia Automation Studio. Reason: While recording, the lookup results might display names with secondary information as well. In such cases, the Qualitia Automation Web Recorder captures both values. For example, if you search for "John" and there are results that display the related names with their secondary information, such as their designation, team, and so on, then the recorder captures both values. Refer to the following screenshot for more information: Here the recorder selects the parameter as "John Lightning Training" instead of only "John". Solution: Manually edit the parameters of the SearchandSelect action in QAS, keeping only the relevant information. Problem: The PressKeys action does not work when a test case is executed on an Inactive screen of a VM. Reason: Either the screen is minimized or VM is disconnected. Summary: RDP (Remote Desktop Protocol) allows a user to connect with another remote machine using a GUI. Whenever a RDP connection is initiated between the host and VM, the host transfers the data to VM using RDP driver. This driver also manages the GUI. However, when the VM is disconnected or minimized, the RDP session is closed and no data transfer happens. To perform GUI operations like press keys, mouse movement, and so on, the GUI must be open. So, when the VM is disconnected or minimized, the PressKeys action fails as the GUI is no longer available. Solution: To perform the PressKeys action on an inactive screen, try the following methods: A. Using Windows Shell Case 1: When the screen is minimized On your local computer, close all open Remote Desktop sessions. Launch the Registry editor (regedit.exe). Do one of the following: To specify the setting for the current user, open HKEY_CURRENT_USER\Software\Microsoft\Terminal Server Client. To specify the setting for all the users, open HKEY_LOCAL_MACHINE\Software\Microsoft\Terminal Server Client. Create a DWORD value as RemoteDesktop_SuppressWhenMinimized and set it to 2 (hexadecimal or decimal). Modify the registry settings on your local (controlling computer) so that minimizing the Remote Desktop window does not affect the GUI of the controlled computer. Close the Registry Editor. Case 2: When The VM is disconnected The press keys functionality is achieved by using a script with the SendKeys action, in VBScript. To open the RDP session, Windows provides the tscon utility which allows to connect to another session on a Remote Desktop session Host server. To ensure the console RDP session remains open, disconnect the VM by running the following command in cmd as an administrator: Here, RDP-Tcp#NNN is the ID of your current Remote Desktop session, for example, RDP-Tcp#5. You can find this ID under Task Manager > Users > Session. Pre-requisites: Ensure that the connection is alive between host and VM machine Ensure that you have administrator access B. Setting the PressKeysOnInactiveScreen flag in the Associated Execution Profile You can consider this solution if you do not have the administrative rights. To perform the press keys on an inactive screen, set the value of the PressKeysOnInactiveScreen flag to true. When set to true, Qualitia internally uses the selenium web driver's Actions class to press keys. Note: Selenium does not support few keys, as mentioned in Working of Qualitia PressKeys | Using-Actions-class-provided-by-Selenium-Web-driver. Problem: ClickJS Action fails to execute on Chrome though javascript is enabled on Chrome. The application under test shows a message as Redirect Blocked. A sample screenshot is shown below: Solution: Before executing the test suite, you need to configure the mapped or default execution profile from the Qualitia client. If you are executing through the offline suite, open the Qualitia Offline Configuration Manager to select the offline suite and the mapped execution profile. Perform the following steps: Open the mapped or default execution profile. Select the Browser as GoogleChrome. Select the Edit Desired Capabilities checkbox. Select the ChromeOptions checkbox. Select the args checkbox, and enter the following text next to it: --disable-web-security Problem: The actions related to querying on a database did not execute such as ExecuteQueryAndStoreInFile and ExecutQueryAndStoreInKey. Description: For Quallita versions before v8.0.0, DB jar was manually added in lib folder. However, from Qualitia v8.0.x onwards, you now need to specify the path of DB jars for the database type on which you want to query. Solution: Perform the following steps: Download one of the following relevant DB jar. From the Qualitia client, select the associated project. Click Settings > Project Configuration > Manage Dependent jar. Enter the location of DB jar. Click OK. Now, execute the test suite again. This action is designed to upload files from the local directory when executing the test case. In case your test execution environment is other than Local, such as Remote, Sauce, Perfecto, and so on, files will be uploaded from where you initiate the test case execution. For example: On Sauce Labs, this action found working seamlessly on Google Chrome version 60 and below and Mozilla Firefox version 47 and below with their default drivers. If the Google Chrome browser version is 61 to 64, you must use chromedriver version 2.29 for this action to work. This action does not work with Mozilla Firefox version 48 and above, Internet Explorer, and Safari browsers. These findings are tested and verified at the time of documenting this information and are subject to change based on the changes made to the respective browser and driver versions. This topic provides information about the issues that you may face while working with an offline package. Problem: You have already created an offline package. But later when you create a new custom action and use it in a test case, the action is not reflected in the offline package. Solution: Create a new offline package for the newly created custom action. For more information, refer to Creating an Offline Package. Description: Upon importing an offline package report, Qualitia sometimes might prompts the following error message: “Projectname_projectdb.tblsuite_summery does not exist”. Solution: You need to navigate to any other tab such as Development or Execution and return to the Reports tab. If the problem persists, restart the Qualitia client. This issue occurs when the configuration file is missing. The file is created when you save the configuration settings for the first time. This issue may occur when creating offline package (from File > Offline Package) as well. Solution: Log on to Qualitia Automation Studio. On the Setting menu, click Configuration Setting. Click OK. Now create an offline package from File > Offline Package. This topic provides information about the issues that you may face while working on iOS Platform and Macintosh. Problem: Test case execution on iOS platforms or a Macintosh computer fails with the following error: “Execution is failing due to incorrect URL formation. Getting an error Original error: Failed to connect to /<VPN_ip_address_of_macintosh_computer>:<port>” Summary: This issue occurs when the Endpoint Security Firewall settings on the Macintosh computer restricts communication from the Windows computer where the QAS client is installed. Solution: To resolve this issue you must enable communication between the Computers as follows: All Computers (in this case 2) should be connected over the same network. Use VPN to connect all the Computer on same network Whitelist the following ports in the VPN. 4723 or the port number where the Appium server is running on the Macintosh Computer 21000 8887 8889 4001 Add rules to open TCP and UDP ports from the Endpoint Security Product. Ensure that both the incoming and the outgoing traffic is allowed. Ensure that you are connected to the VPN while creating rules using the Endpoint Security products. Qualitia recommends using VPN generated IP address for secure communication. For example, to execute a test suite on a different Computer, specify the VPN generated IP address of that Computer in the execution profile. You must refer to the documentation of your Endpoint Security product for instructions to allow communication between Windows and Macintosh Computers. Problem: Unable to connect to the MOS server on a Macintosh computer from the QAS client on a Windows computer. The following error occurs when you try to connect to the MOS agent on a Macintosh computer: Port might not be accessible. Server URL might be wrong. Please ensure that MOS server is installed and the MOS service is running on the specified port. Summary: This issue occurs when the Endpoint Security Firewall settings restrict communication from the Windows computer where the QAS client is installed. Solution: To resolve this issue you must enable communication between the Computers as follows: All Computers must be connected over the same network. Use VPN to connect all the Computer on same network Whitelist the following ports in the VPN. 4723 or the port number where the Appium server is running on the Macintosh Computer 21000 8887 8889 4001 Add rules to open TCP and UDP ports from the Endpoint Security Product. Ensure that both the incoming and the outgoing traffic is allowed. Ensure that you are connected to the VPN while creating rules using the Endpoint Security products. Qualitia recommends using VPN generated IP address for secure communication. For example, To connect to the MOS server present on Macintosh Computer, specify the VPN generated IP address of the Computer on which MOS sever is running. You must refer to the documentation of your Endpoint Security product for instructions to allow communication between Windows and Macintosh Computers. Problem: When upgrading the MOS agent from any of its previous version, you may face issue in an ongoing MOS or Mobile Recorder session. Reason: After uninstalling the previous MOS agent and MOS Server on the Macintosh machine, the WDATemp folder is not getting cleaned. Hence, when you install the new MOS agent build, it still uses the older WDA dependencies that are present in the WDATemp folder, which causes the problem. Solution: After installing the new MOS agent on the Macintosh machine, you need to restart the machine. The WDATemp folder is cleaned and it downloads the newer WDA dependencies. This topic provides information about the issues that you may face while working with TFS/Azure DevOps. Problem: Unable to link Qualitia Test Cases with TFS/Azure DevOps Test Cases. Solution: Qualitia integration with TFS/Azure DevOps expects that you have “Update Work Items” access that is used to generate the PAT (Personal Access Token). The PAT with required access can be procured in one of the following ways: Generate the PAT with a user that is part of the Project Administrators group. Allow Bypass Rules on Work Items Updates In TFS/Azure DevOps project, ensure that the user that is used to generate PAT is member Contributors group / Project Team members group. Click Project Settings > Permissions. Select the user group that has the user to whom you want to provide access (Contributors/Project Team members). From the Bypass rules on work items updates list, select Allow. Qualitia does not recommend this option for PAT generation as it changes the access levels for all the users in the group. Note: Please connect with your Azure DevOps Admin team to discuss the PAT generation and access level management. This topic provides information about the issues that you may face while working with Continous Integration tools such as Jenkins and Teamcity. Problem: After an offline suite is executed using a Jenkins Job, the associated suite execution report is not displayed in Jenkins Reports. Description: When you open the published suite execution report in Jenkins, you see any of the following behavior: A blank page opens The following message is displayed: Solution: You need to set up the content policy in Jenkins. Perform the following steps: Open the Jenkins Server. Click Manage Jenkins >Manage Nodes. Click the Settings icon for the node that you are using (Master node by default). In the node page, select the Script Console option in the side menu. In the script console, enter the following command line: System.setProperty("hudson.model.DirectoryBrowserSupport.CSP", "default-src 'self' 'unsafe-inline';") Click the Run button below to this console, and you should see the Result: with the above values printed. Sometimes users are unable to view the test case execution on the designated TeamCity build agent. It is observed that setting the right Java path resolves this problem. You can try below: Install or upgrade Java to JRE 8.0 at the default location. (C:\Program Files\Java\jre1.8.0_101\bin\java.exe) Update java path to this new location in the Environment Variables section (either under JAVA_HOME or Path).General Issues
Unable to launch Qualitia Automation Studio
Unable to Add New LDAP User in Qualitia Automation Studio
Qualitia Shows Java Out of Memory Error
java.lang.OutOfMemoryError: Direct buffer memory
    at java.nio.Bits.reserveMemory(Unknown Source) ~[?:1.8.0_231]
    at java.nio.DirectByteBuffer.<init>(Unknown Source) ~[?:1.8.0_231]
    at java.nio.ByteBuffer.allocateDirect(Unknown Source) ~[?:1.8.0_231]
    at io.undertow.server.DefaultByteBufferPool.allocate(DefaultByteBufferPo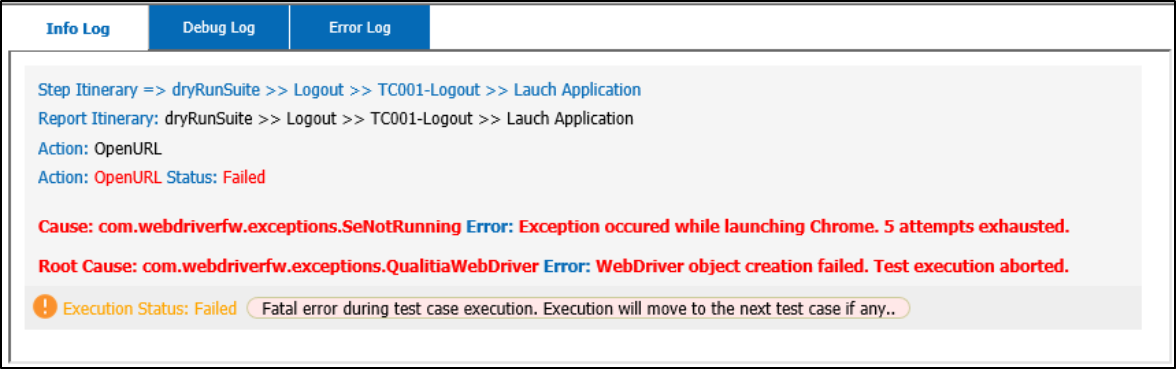
ol.java:146)Exception Occurred While Launching Chrome. X Attempts Exhausted
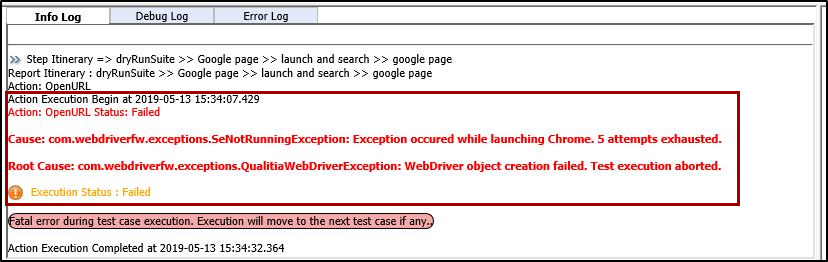
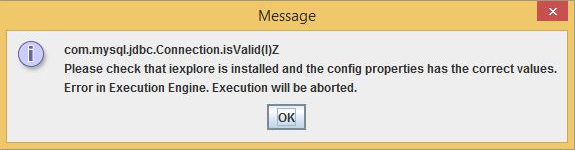
In such cases, you must update the browser driver versions. You can get the correct chrome drivers here.Suite Execution Fail Error: com.mysql.jdbc.Connection.isValid(I)Z

Suite Execution Gets Aborted During Execution for Suite with Test Cases Having 1000 or More Test Steps
“Fatal exception during execution” Error Appears While Executing a Suite
Error Messages in Qualitia Client Server Connection
![]() User will get this error when executing test case for Desktop Web as well but Qualitia ignores this error and continues execution of test case.
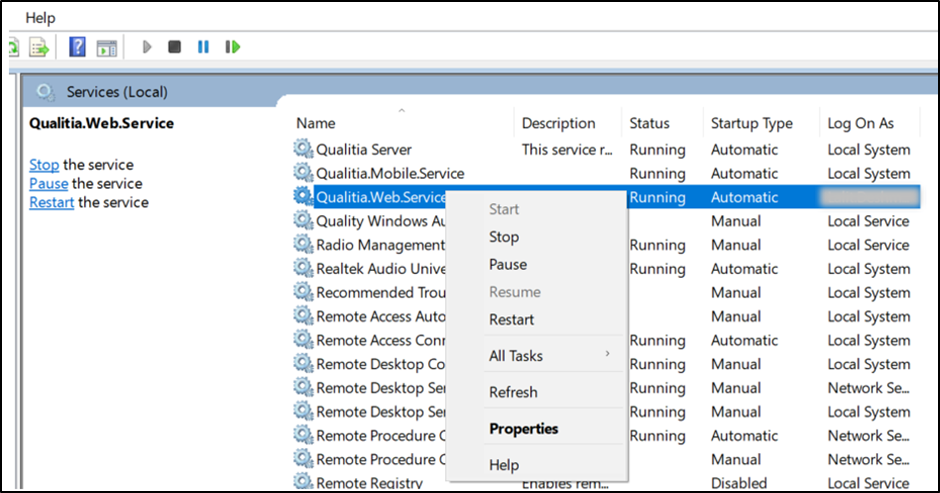
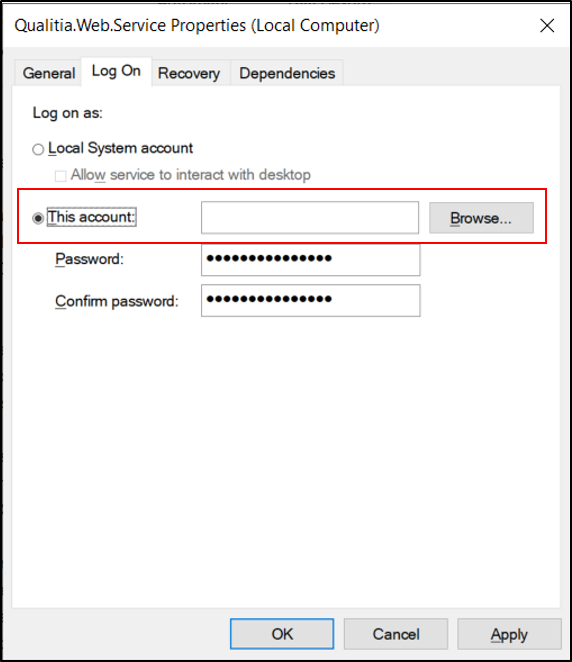
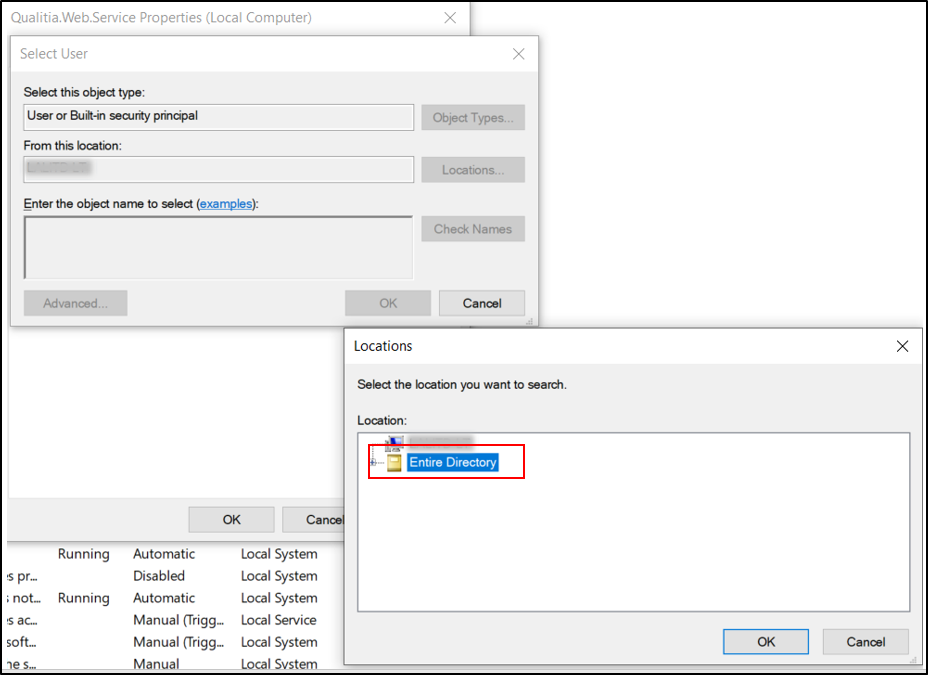
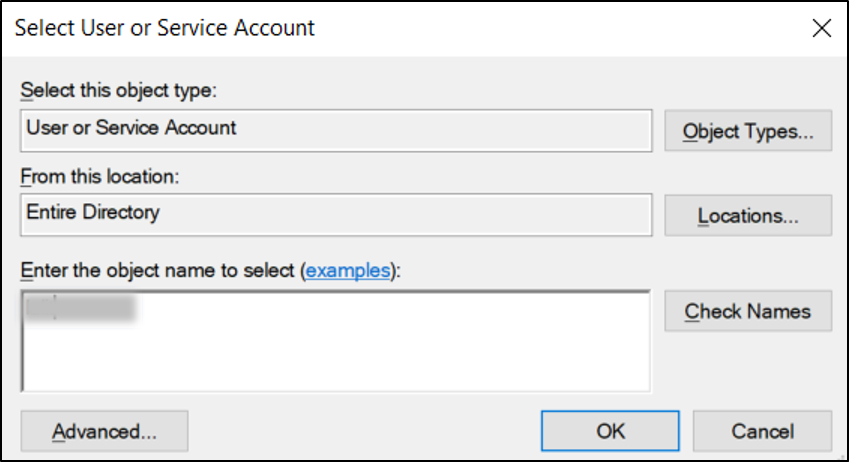
User will get this error when executing test case for Desktop Web as well but Qualitia ignores this error and continues execution of test case.Qualitia Server Not Responding After Installation

Reports and Dashboards are Not Visible in Qualitia
Execute Tab and Database Restore Due to Less Packet Size
Qualitia Server is not Getting Connected
Does not Execute Test Case due to Add-Ons in Chrome
Now, re-execute the test suite or test case.Communication Fails when Qualitia Components are on Different Computers
Cannot connect to Qualitia Server there might be the following reasons:
Cannot connect to Qualitia MOS server there might be following error:Licensing Issues
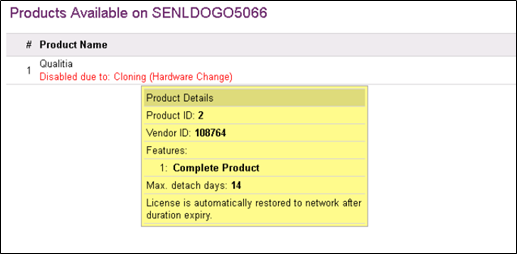
Cloned License Manager SL secure storage detected. (H0064) Error Message
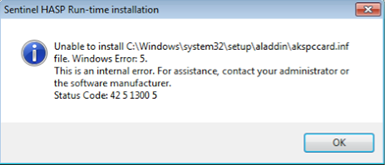
Unable to Install Sentinel HASP
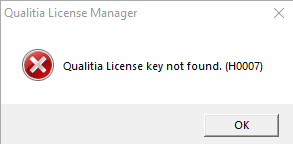
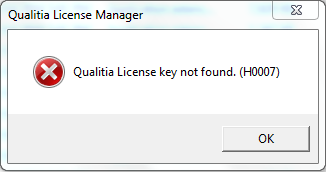
Qualitia License Key Not Found. (H0007)
SERVERADDR = IP address of the license manager system.
Broadcastsearch=1
For Example: If your license manager system’s IP address is 192.168.1.1 then setting will be: SERVERADDR = 192.168.1.1
Note: If not present, manually create folders SafeNet Sentinel/Sentinel LDK.
You should be able to launch Qualitia with license being acquired from the remote license manager.
You can now log on to Qualitia Client without any error.Test Data Issues
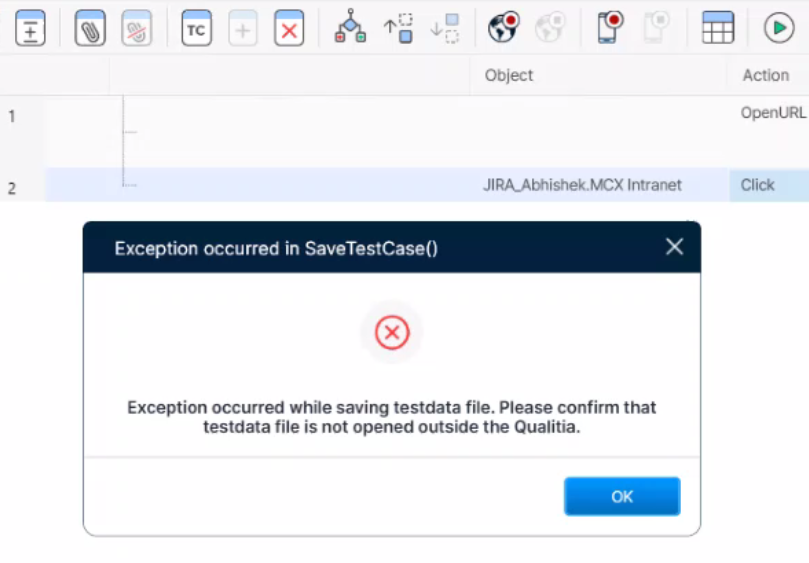
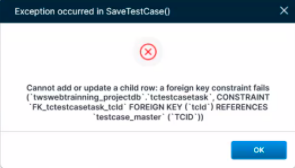
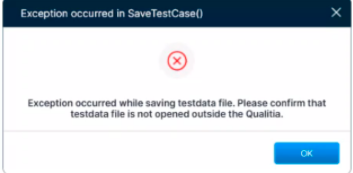
Unable to Add Test Data
Task Iterations Are Not Getting Executed
Note: All the cells can be deleted in a single go except for the first cell immediate below to DataSetTag. You need to delete this cell separately.Version Control Issues
Unable to Push any Project Artifact to the Git Server
For /F "tokens=1,* delims= " %G in ('cmdkey /list ^| findstr git') do cmdkey /delete %HFilename too long (Git-version control system)
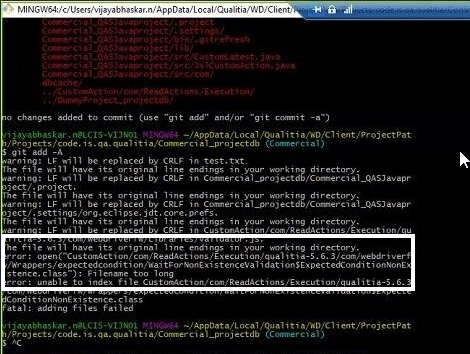
git config --system core.longpaths true
Update the registry key (in Windows 10, version 1607, and later)
HKLM\\SYSTEM\\CurrentControlSet\\Control\\FileSystem LongPathsEnabled (Type: REG_DWORD) should be set to 1.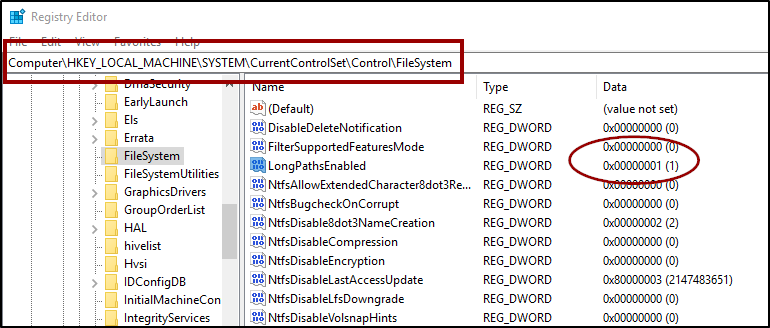
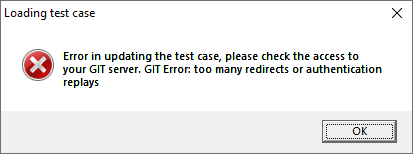
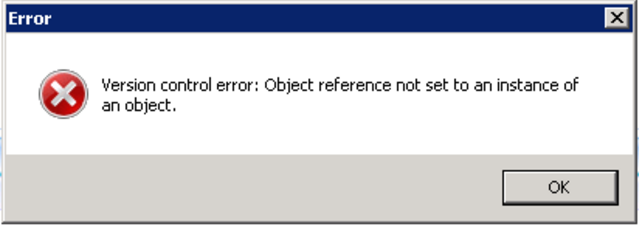
Version Control Error: Object Reference not set to an instance of an object.
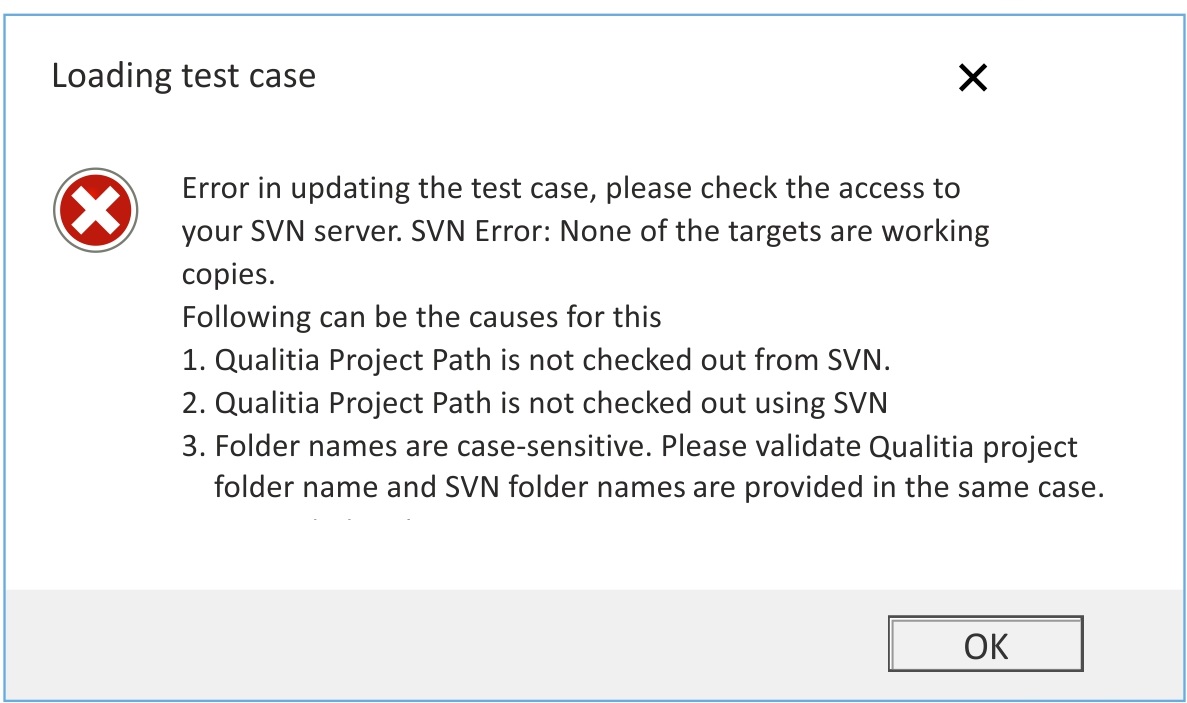
Error in Updating the test case, please check access to your SVN Server. SVN Error: None of the targets are working copies.
Object Spy Issues
Exception Occurred While Launching Chrome. X Attempts Exhausted
In such cases, you must update the browser driver versions. You can get the correct chrome drivers here.Unable to Add Objects using Objects Spy on Google Chrome
Object Spy Not Working

Qualitia Object Spy Does Not Add Objects with XPath Locator Type
Unable to Add Object using Object Spy Due to SQL Server Query Timeout
Qualitia Automation Web and Mobile Recorder Issues
Qualitia Automation Web Recorder is not Working
<setting name="EngineDefaultMemory" serializeAs="String">
<value>-Xms512m</value>
</setting>Unable to Switch to Mobile Web-View
Problem in Viewing Samsung Galaxy S9+ in Qualitia Mobile Recorder
Unable to Start a Session on MOS or Mobile Recorder on Xcode version 11.6 or higher.
A terminal opens to start the agent.
/var/folders/vt/f2c8mcz536x6d9_vbgs7dh740000gn/T/QualitiaMOSAgent/WDATemp
Note: This path differs for every user.
https://github.com/appium/WebDriverAgent/releases
Note: Download the WDA version that best matches to your Xcode Version.
them in the WDATemp folder in the following location: /var/folders/vt/f2c8mcz536x6d9_vbgs7dh740000gn/T/QualitiaMOSAgent/WDATemp
Note: This path differs for every user, you must find the WDATemp folder path as explained in step. 4.
Note: You might have to perform this step every time you restart the machine as the temp folders are deleted and recreated whenever the machine restarts. Unable to Boot Emulator in MOS Session.
You need to select "Quick boot" as the boot action while creating the Android virtual device (emulator).
A pop up screen opens.
Note: If the API level is not downloaded, you need to download it.Browser and Devices Issues
Unable to Load the Chrome/Edge Browser Extension
Note: You require 7-Zip tool to perform this activity."key": "MIIBIjANBgkqhkiG9w0BAQEFAAOCAQ8AMIIBCgKCAQEA1nNiSfr3mNspSohi6ui/m2CVFKOsS7GxOmwXNTP5pMgW7dManR+jf8DCggQTO5+u6UIl7uBs8Vx4Z96oe7P8UUb2ByGbjXorr5AzQJ4vijvUcUyrZVRk8Wa6P+WtQ+2RO8pR2XnByIzFoII3cvTrVqsWpBjFSfjAxin2Lme4AcCAt+rAF5ce/2VRXq2A9uVamQP7ZzUcG8rTc3fz/bqwiVOvMbTafplvg7yKPL5sUHbjZwXMubLdeSGUvUh++qy8PUt14eHzV2uQluxIVq7L2dYhnB2C0fZy8D4uzErJywDogMFWrf9tU1b6tXMVjAFRKa6ddinWbqGKwT+02kBxTQIDAQAB",How to Update Chrome Driver
Unable to Add Objects using Objects Spy on Google Chrome
Unable to Execute Test Cases on a Custom Browser Profile
user data directory is already in use".Test Suite Execution Fails on Google Chrome Due to Certificate Authority
This driver is not configured for integrated authentication

![]() If you are using 32-bit, then copy sqljdbc_auth.dll from x86 folder and if you are using 64-bit, then copy sqljdbc_auth.dll from x64 folder.
If you are using 32-bit, then copy sqljdbc_auth.dll from x86 folder and if you are using 64-bit, then copy sqljdbc_auth.dll from x64 folder.Actions Issues
The DragAndDropToObject Action is not Working
The OpenApplication Action is Getting Failed
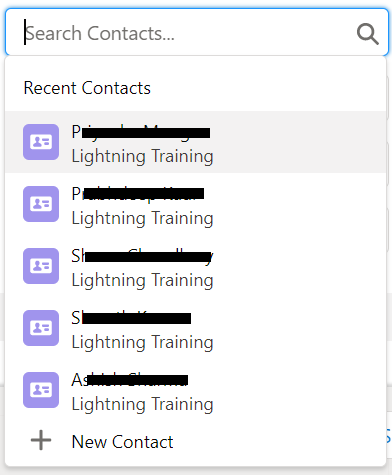
The SearchandSelect Action of Lookup is Getting Failed
The PressKeys Action Does not Execute on an Inactive Screen
%windir%\System32\tscon.exe RDP-Tcp#NNN /dest:consoleThe ClickJS Action is Failing on Chrome
.jpg?inst-v=5750eded-a48a-45b9-bf4f-184951f1a5ef)
Actions Related to DB Failed Upon Execution
AttachFile Action Not Working/Failing
Also, execution of this action highly depends on the browser and driver version you are using.Offline Package Issues
Newly Created Custom Action Not Reflecting in the Existing Offline Package
Importing Offline Package Report
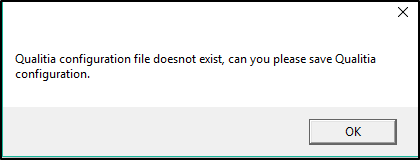
Qualitia configuration file does not exist, can you please save Qualitia Configuration

iOS Platform and Macintosh Issues
Test Case Execution on iOS platforms or a Macintosh Computer Fails
Unable to connect to MOS Server Running on a Macintosh Computer from the QAS client Running on a Windows Computer
Unable to connect to MOS server that is present on different machine than Qualitia client. Getting an error
Cannot connect to Qualitia MOS server, there might be following reasons:Getting an issue in MOS session after Uninstalling the Older MOS agent and Installing a New MOS Agent due to WDA Dependencies on Macintosh Machine
TFS/Azure DevOps Issues
Unable to Link Qualitia Test Cases with TFS/Azure DevOps Test Cases
Description: The message as “Error in linking the Test Case” is displayed. The reason is the user is missing certain access permissions in TFS/Azure DevOps.
Qualitia recommends this option for generating a PAT.
Perform the following steps:
Refer to the following screenshot.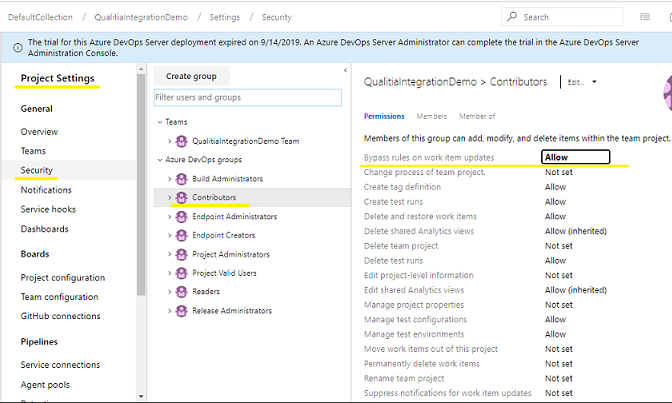
Continuous Integration Issues
Unable to view Qualitia Suite Execution Summary Report in Jenkins
“You need to enable JavaScript to view this”
Note: If you don’t see it in the first attempt, then retry this step.
You can now see the suite execution summary reports.Teamcity Agent Running Headless Execution on Window Server System
Desktop Automation
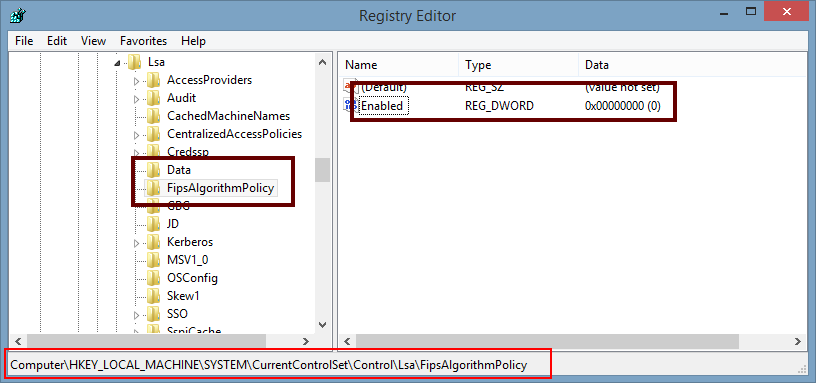
This topic provides information on how to resolve the common issues you may encounter while working on desktop applications automation. You may find execution reports are not getting generated after the suite execution is completed. At times, some of the Windows policies block Qualitia registering few Qualitia components. This may result in not generating results for the Suite executions. In order to resolve this issue, you must update the Windows registry-based as mentioned below: Press Win+R to summon the Run dialog box. Type Regedit and press Enter. In Windows 7 and Windows Vista, click the Yes or Continue button or type the administrator's password. Go to HKEY_LOCAL_MACHINE\SYSTEM\CurrentControlSet\Control\Lsa\fipsalgorithmpolicy registry. Set the value as 0 as mentioned in the screenshot below. Close Registry. This error occurs when using Qualitia with SQL server 2016 developer edition and the Authentication Mode is set as Windows Authentication. Solution: Download Microsoft JDBC Driver 6.0 for SQL Server. Unzip the file at some temporary location. Go to enu > Auth. Copy the dll depending on your OS (32 or 64-bit) version. Open the Java directory that is set under Configuration Settings > Execution > Java Install Path. Add the dll file to lib and bin folders. If you are using jre7: Go to enu > jre7. Copy sqljdbc41 and add it to Qualitia installed location [C:\Program Files (x86)\Qualitia\Qualitia 8.0.0\WebDriver\lib]. If you are using jre8: Go to enu > jre8. Copy sqljdbc42 and add it to Qualitia installed location [C:\Program Files (x86)\Qualitia\Qualitia 8.0.0\WebDriver\lib]. This issue occurs when the configuration file is missing. The file is created when you save the configuration settings for the first time. Solution: Log on to Qualitia Automation Studio. On the Settings menu, click Configuration Settings. Click Save. This issue occurs when .Net framework installed is not compatible. Qualitia Automation Studio requires minimum .Net Framework 4.6.2 installed in the system where the client is being installed. Solution: If you face the error mentioned above, close the dialogue box and upgrade the .Net Framework to 4.6.2. Refer to the Prerequisites and Configurations section for more information. Some organizations follow a practice of creating Virtual Machines (VM) with standard configurations and then clone it for different users to use. If they install Qualitia on the base image, Qualitia licensing manager may get duplicate installation id for the cloned VM. In all likelihood, the end user may receive a licensing error. It is, therefore, recommended to install Qualitia separately on the VMs after they are cloned. When trying to log in into Qualitia, the user may get the following error [when the machine is cloned with Qualitia Installation]. Solution: In case you come across this error: Ensure that the license server is up and running. Verify that the Sentinel LDK License Manager service is started. (To open Windows services console; press Windows R and then enter Services.msc) Restart the Sentinel LDK License Manager service using Windows services console. If the issue still persists, follow the steps mentioned below: Create a file with its name in the following format - hasp_108764.ini Open this file using notepad and add the following setting in it: For Windows 7 and later versions, copy the hasp_108764.ini file to the following location: %localAppData%/SafeNet Sentinel/Sentinel LDK/ Open the url http://localhost:1947 and go to Configuration > Access to Remote License Manager, select all checkboxes, add required information and then click Submit. Go to Windows services console (Press Windows R and enter services.msc to open Windows Services console). Select the service Sentinel LDK License Manager and restart it. For Verification if the license has been recognized by the license server, open the Sentinel ACC portal (http://localhost:1947) and click session to view the licenses acquired by various systems. You can now log on to Qualitia Client without any error. When a test case execution starts in Internet Explorer, the Internet Explorer does not open, and UFT closes. Also, in the Errorlog.txt, a message is displayed as “Testcase xml is missing”. The reason is due to the unavailability of the relevant add-in of the Internet Explorer for testing the application. Solution: Open the UFT, specify the application URL, and the browser as Internet Explorer. Click the Record button. Click Yes to enable the required add-ins. Record a few steps and save them. Run them through UFT. If the execution is successful, open the Internet Explorer, and check the name of the new add-in enabled. Run the test case through Qualitia. Problem: Getting the following error message while creating a test case. Reason: This issue occurs when the antivirus software blocks Qualitia application from running. Solution: Whitelist all the files under the %localappdata%\QualitiaWDClient folder in antivirus.Execution Report Not Getting Generated
This driver is not configured for integrated authentication

![]() If you are using 32-bit, then copy sqljdbc_auth.dll from x86 folder and if you are using 64-bit, then copy sqljdbc_auth.dll from x64 folder.
If you are using 32-bit, then copy sqljdbc_auth.dll from x86 folder and if you are using 64-bit, then copy sqljdbc_auth.dll from x64 folder.Qualitia Configuration File does not exist, can you please save Qualitia Configuration.
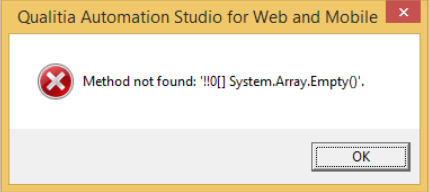
Incompatible .Net Framework: Method not found: '!!0[] System.Array.Empty()'
Cloning Machines with Qualitia Installation is Not Supported

Qualitia License Key Not Found. (H0007)
SERVERADDR = IP address of the license manager system.
For Example: If your license manager system’s IP address is 192.168.1.1 then setting will be: SERVERADDR = 192.168.1.1
Note: If not present, manually create folders SafeNet Sentinel/Sentinel LDK.
You should be able to launch Qualitia with a license being acquired from the remote license manager.Unable to Execute Test Cases in Internet Explorer
A pop-up message opens which shows the message as “Some third-party add-ins are required to launch this URL. Do you want to enable these add-ins?”Test Case Creation Fails with "Exception occurred while saving testdata file"