
Test Case Creation and Management
A Test Case consists of steps and may contain single or multiple tasks. Each step contains an action along with its associated objects and parameters. Define the sequence of the steps in a test case that resemble the flow of a test scenario. You can add test data as per the requirements.
A test case determines whether the application under test meets the defined specifications under the given set of conditions or variables. Test cases are also created to validate if an application meets the business and functional requirements.
Before you create a test case, create a test scenario or select from available test scenarios.
A Test Case Editor screen contains buttons that you can use to add steps or execute a test case.
The following table shows the description of each button.
Button | Button Name | Description |
|---|---|---|
 | Create New task | To create a new task while adding or editing a test case. You need to select a step after which you want to create the new task |
 | Create Tasks using the selected steps | To create a new task using the steps of the test case. You need to select the steps. |
 | Detach Task | To remove a task from the test case. You need to select the task that you want to remove. |
 | Add Test Case Step | To add an independent test case step, that is, a step which is not part of any task. |
 | Add Task Step | To add a step in a task. You need to select a task in which you want to add a step. Note: If you add a new step, ensure that the execution of all the associated test cases are not affected. |
 | Remove Step | To remove a step from the test case. You need to select the consecutive steps. |
 | Add Conditional Block | To insert a conditional statement. For more information, refer to Conditional Structure (IF-ELSE). |
 | Move Up | To move up a selected step. |
 | Move Down | To move down the selected step. |
 | Start Web Recording | To start web recording on a web application under test. Or, if a recording session is on, then this button is replaced with the Pause Web Recording button ( Note: If you have already dry run a test case, you cannot record in the same session. You need to close the browser, open the test case, and then do the recording. |
 | Stop Web Recording | To stop the web recording session. |
 | Start Mobile Recording | To start web recording on a mobile application under test. |
| Stop Mobile Recording | To stop the mobile recording session. |
 | Add Test Data | To insert test data. For more information, refer to Adding a Test Data. |
 | Dry Run | To dry run the test case. For more information, refer to Dry Running a Test Case. |
 | Debug | To debug a test case. For more information, refer to Debugging a Test Case. |
 | Debug Logs | To open the debug execution logs. |
 | Go To Line | To go to a specific line of a test case |
 | Previous Error | To go to the previous step, which has been identified as:
|
 | Next Error | To go to the next step, which has been identified as:
|
 | Save | To save the test case every time you update it. Also, you can click the arrow button to save it as another test case with a different name. |
📚Prerequisites
User should have the Qualitia Boson - Client installed.
User should be assigned to an existing project.
A test scenario should exist.
🔑Privileges
User should have the below privileges to:
Import Artifacts: Import test artifacts from another project.
Manage Custom Action: Add, edit, delete and develop custom actions.
Manage Objects: Control (add, edit, and delete) the objects within your testing environment.
Manage Scenarios: Control (add, edit, and delete) the scenarios within your test suites.
Synchronize Objects: Import and export objects from TSR (Desktop Projects Only).
Test Development: Create, update, and record test cases and tasks.
👁️View Test Cases
Login to Qualitia Boson - Client.
Access Develop from left navigation to view Test Explorer screen.
On the Explorer section, you can view existing Test Scenarios.
Click the Expand option on a test scenario, where you can view all its test cases.
Use the Search bar to search for existing test cases.
Use Jump to Selection icon, if you have a long list of test cases and you want to scroll to the last scenario you were working on.
➕ Add Test Cases
Login to Qualitia Boson - Client.
Access Develop from left navigation to view Test Explorer screen.
On the Explorer section, you can view existing Test Scenarios.
When no Test Cases exist for a scenario, you are prompted to Create Test Case in the Test Case viewer section.
Hover over a test scenario and click + Create to start creating a new Test Case.
You can also click + Create from the top left corner of the tabular section where you see the list of test case.
Clicking Create will open a Create Test Case window with the following fields:
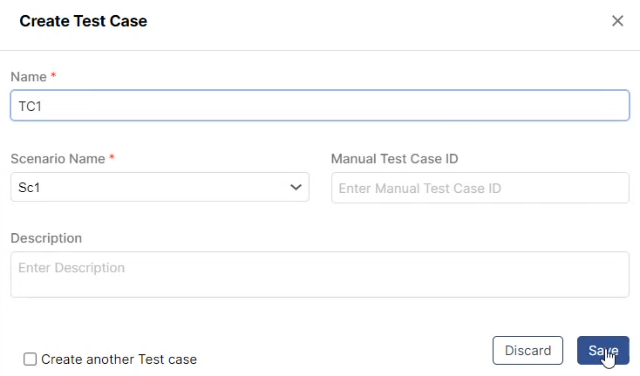
Name: Enter an intuitive name for the test case that is easy to recognize.
Maximum length permitted is 300 characters including spaces.
Scenario Name: This is a dropdown and a searchable field. You can search for a required scenario from the list of already present scenarios under which you want to add a Test Case.
Manual Test Case ID: Based on the naming conventions your organization follows, enter a unique manual test case ID.
Note: If an ID already exists, you cannot use the same ID.
Description: A brief description about the test case.
If you intend to create multiple test cases, click the Create another Test case checkbox.
Once completed, click Save to proceed; otherwise, click Discard.
Clicking Save adds a new test case to the given test scenario.
Repeat steps from 4 through 6 for each additional test case you want to add.
Additional actions you can perform:
Expand All - Expand all the test scenarios.
Collapse All - Collapse all the test scenarios.
Refresh
If a new test case or scenario is added or updated a Red Dot is displayed near the Refresh button. If you want to apply the changes, click Refresh.
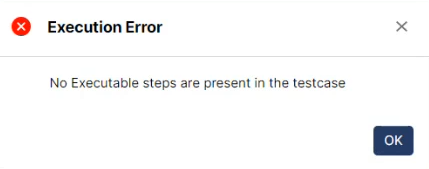
When a test case does not contain any executable steps, clicking Execute or Debugger displays an error popup.
🧑💼Manage Test Cases
You can update and delete test cases for a given scenario.
🔄Update
Login to Qualitia Boson - Client.
Access Develop from left navigation to view Test Explorer screen.
On the Explorer section, you can view existing Test Scenarios.
Click the Expand option on a test scenario, where you can view all its test cases.
By hovering mouse over a test case, you can view an Edit option.
Click the Pencil icon.
Alternatively, you can select a test case from the tabular section where you will see a list of test cases and click Pencil icon from the top left corner of the section to edit.
Clicking the Pencil icon, a new window appears where you are prompted to update:
Name: Update a name of the test case.
Maximum length permitted is 300 characters including spaces.
Scenario: This is a dropdown and a searchable field. You can change or update the scenario from the list of already present scenarios if you don’t want to continue with the one under which the Test Case was initially created.
Description: A brief description of the test case.
Manual Test Case ID. Based on the naming conventions your organization follows, provide a unique manual test case ID.
Note: If an ID already exists, you cannot use the same ID.
Click Save to update the test case; otherwise, click Discard.
❌Delete
Login to Qualitia Boson - Client.
Access Develop from left navigation to view Test Explorer screen.
On the Explorer section, you can view existing Test Scenarios.
Click the Expand option on a test scenario, where you can view all its test cases.
You can select the test case from the tabular section and click the Bin icon to delete.
Clicking Delete will open a new window titled Test Case Deletion with a message Are you sure you want to delete the Test Case?
Click Yes, Delete to continue; otherwise, click Cancel.
You will see a message Test Case deleted successfully.
Disable Screenshot at Step Level
Qualitia Boson now allows you to disable the screenshot at test case step level. This feature has been introduced to reduce the execution time.
Follow the below-mentioned steps to disable the screenshot:
Login to Qualitia Boson - Client.
Access Develop from left navigation to view Test Explorer screen.
On the Explorer section, you can view existing Test Scenarios.
Click the Expand option on a test scenario, where you can view all its test cases.
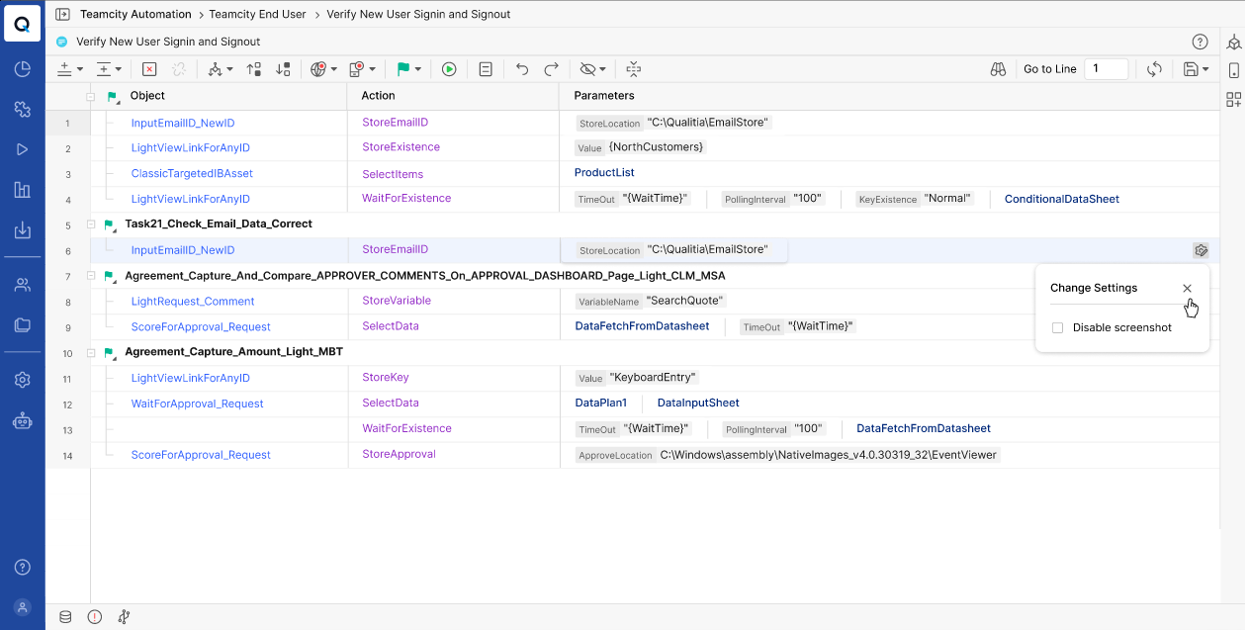
Click the test case from the tabular section to open the Test Case Editor screen.
Go to a test case/task and hover over the step, for which you want to disable the screenshot, to see the Settings icon.
Click the Settings icon at the right corner to open Change Settings.
Select Disable screenshot to disable the screenshot.
The Disable screenshot settings can be updated only from the Test Case editor.
Disable Screenshot at Action Level
To disable screenshot for an action, follow the below steps:
Go to Settings from left navigation.
Click Execution Configuration under Local Profile.
Select the action for which you want to disable the screenshot from Exclude Actions From Screenshot Capture field.
For the selected action the screenshot will not get captured in the entire project, wherever the action is used in test case or task.
OR
Access Execute from left navigation of your Qualitia Boson - Client to view Test Suite Explorer screen.
Go to the Execution Profile tab.
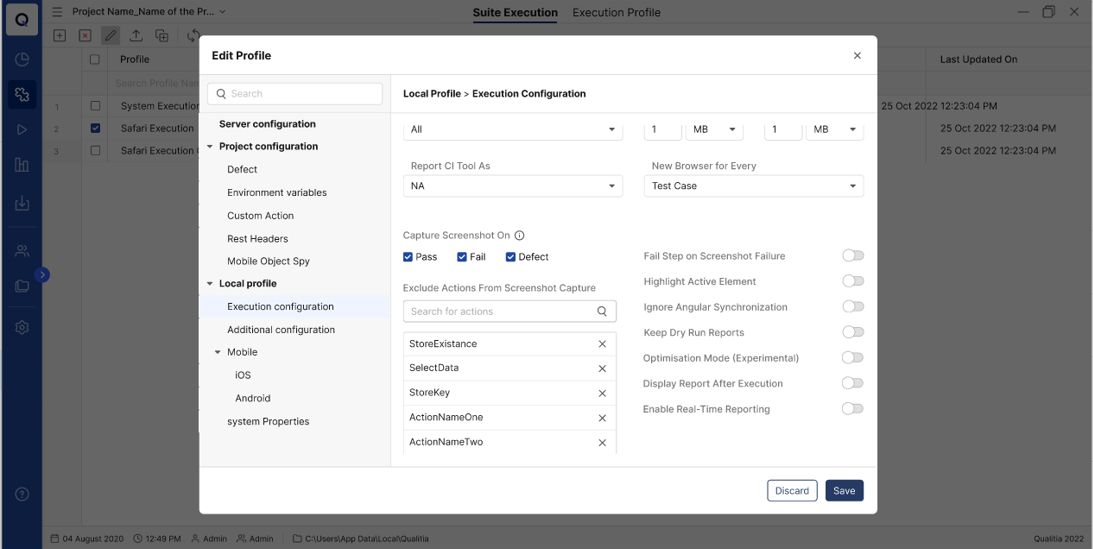
Select the default profile and click the Pencil icon to open Edit Profiles window.
On the Edit Profiles window, select the action for which you want to disable the screenshot from Exclude Actions From Screenshot Capture field.
You can search action and select it.
Empty Test Case and Task Handling
This enhancement improves validation and behavior for empty or skipped test cases and tasks.
Creation:
New test cases and tasks are empty by default.
“Test case is empty” / “Task is empty” message shown in the Problem Toolkit.
Save button remains disabled until steps or tasks are added.
Users can still perform Save As on empty test cases or tasks.
Skipped Steps:
Test cases or tasks with all steps skipped are treated as errors.
The same “Test case is empty” or “Task is empty” message is shown.
Suite Execution:
Empty test cases can be added to suites.
During execution, a popup lists empty/error test cases:
“Following test cases are empty / contain errors, hence those will not be executed.”
Reports:
Empty, erroneous, or skipped test cases appear in reports.
If all test cases are invalid, execution stops and no report is generated.
Publish:
Empty test cases cannot be published.
💡 Golden Nuggets: Best Practices for Test Scenario Management
When managing test cases in Qualitia Boson, a strategic approach can improve efficiency and prevent issues down the line. Here are some best practices to consider:
Break scenarios into test cases: Once you have defined scenarios, break them down into individual test cases that cover specific functionality or test conditions. Each test case should focus on testing a single aspect or behavior.
Example: In an e-commerce application scenario called "Checkout Process," break it down into separate test cases such as "Add Item to Cart," "Apply Coupon Code," "Select Shipping Method," and "Place Order." Each test case focuses on testing a specific functionality within the overall checkout process.Create modular and reusable test cases: Design test cases in a modular and reusable manner. This means that test cases can be executed independently and reused in different scenarios or for cross-functional tests. Avoid duplicating test steps or data across multiple test case.
Example: Create a reusable test case called "User Login." This test case covers the login functionality and can be reused across different scenarios that require user authentication. Avoid duplicating login steps in other test cases and instead reference the "User Login" test case.Define scenario-specific setup and teardown: If certain test cases within a scenario require specific setup steps or teardown activities, define them at the scenario level. This helps in maintaining consistency and ensures that necessary preconditions are set up before executing the test cases.
Example: In a scenario related to file upload functionality, define the setup steps at the scenario level to ensure that the necessary preconditions are met. This could include actions such as creating test files in a specific directory or configuring the file upload settings before executing the related test cases.Use descriptive scenario and test case names: Provide clear and descriptive names for scenarios and test cases. Use naming conventions that indicate the purpose, functionality, or specific test condition being addressed. This makes it easier to locate and understand the tests.
Example: Use clear and descriptive names such as "Product Search by Keyword" for a scenario and "Verify Search Results Displayed" for a test case. This naming convention makes it easier to understand the purpose and functionality being addressed without delving into the specific test steps.Use placeholders for test steps: Instead of providing specific test steps, use descriptive keywords or phrases that outline the intended actions. For example, use terms like "perform action A" or "verify result B" without going into implementation details.
Focus on test objectives: Clearly state the objective or goal of the test case without specifying the exact steps to achieve it. For instance, mention the expected outcome or behavior you want to validate, rather than the specific actions to take.
Example: State the objective as "Verify successful payment processing" instead of providing detailed steps on how to achieve it. This focuses on the expected outcome or behavior to be validated rather than prescribing the exact actions to take.Document test assumptions: If there are any assumptions related to the test case, explicitly state them in a separate section. Assumptions can include prerequisites, specific system states, or test environment conditions. By doing so, you keep the test steps independent of these contextual factors.
Example: In a test case, explicitly state assumptions such as "Assumes a valid user account already exists" or "Requires a stable internet connection." This clarifies the preconditions or contextual factors without embedding them within the test steps.Exclude specific test data: Avoid including specific test data or examples within the test cases. Instead, indicate the type or characteristics of the data required without providing actual values. This allows for flexibility in selecting appropriate test data during execution.
Refer to external sources: If there are external resources, documents, or specifications to be used during the test, mention them without embedding the actual content. This approach maintains the test case's independence from specific reference materials.
Separate test configuration details: Keep any configuration or setup details separate from the test case itself. If there are specific configurations required for the test, refer to them without providing the actual configuration values or steps.
Regular Reviews: Conduct regular reviews of test cases and usage to optimize test scenario management.
🔧 Got a problem? Let’s fix!
Not able to understand what a tabular section for a test case is?
Let’s try to understand. Once you go to the Test Explorer and expand scenario, you will see a list of test cases on the right side of the Test Explorer. This screen is nothing but the tabular section. Here, you can select a test case and edit or delete it.
Struggling to find a delete option for test cases?
Once you go to the Test Explorer and expand scenario, you will see a list of test cases on the tabular section. Select a test case from the list and you will see an active Bin icon on the top left corner of the screen. Click on the Bin icon to delete the test case. The delete option will be inactive until you select a test case.
Sleep action is taking significantly longer than expected for a test case involving both mobile and web applications.
To resolve this issue, disable the screenshots for sleep actions at step level by following the below steps:
Open the test case in Qualitia.
Locate the Sleep action causing the delay.
Hover over the action step and you will see a settings gear icon to your extreme right.
Click on the settings icon and select the Disable Screenshot checkbox.
Click Save, and re-execute the test case.
📞📚 Here to Help: Support and Resources
If you have questions that are not addressed in the documentation, you may raise them in the Qualitia Community.