
Mobile Application
This guide introduces you to a pivotal component of Qualitia Boson – Mobile Recorder and covers its core features, from the intuitive recording toolbar to the advanced verification steps, mouse hover actions, browser simulations, and the dynamic locator type priority. Let’s discover how the Mobile Recorder can redefine your test automation experience.
To use Moblie Recorder for a web application:
Login into your Qualitia Boson - Client.
Access Develop from the left navigation menu.
You can automate a test case or a task using the Mobile Recorder. In case of a
Test Case
On the Explorer section, you can view existing Test Scenarios.
Select a Test Scenario and click the Expand option.
Tasks
On the Explorer section, click Tasks.
Select a Task and you can view its test cases.
Initiate a New Test Case Recording.
Within any scenario, you can find a list of existing test cases.
Click Create a New Test Case or use the Mobile Recording (
 ) icon located in the toolbar at the top of the screen.
Clicking Mobile Recording will open a screen with a message Checking pre-requisites for automating mobile. If the pre-requisites are not available, it will ask you to update and try again. Refer Mobile Configuration - Help Center - Confluence to get your machine mobile ready.
Note: Checking pre-requisites will take time the first time.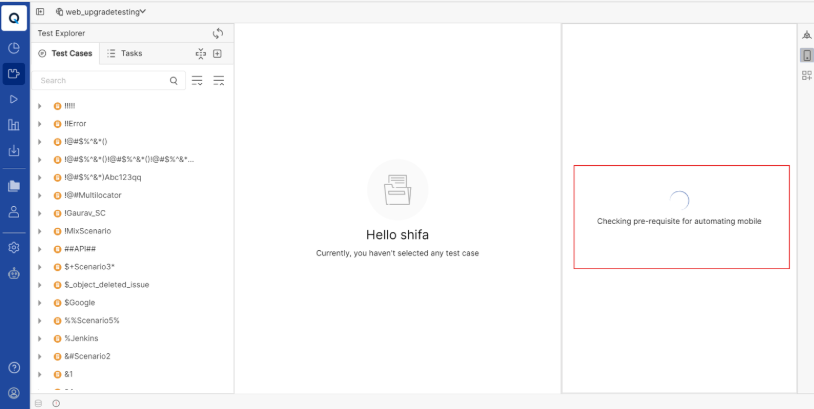
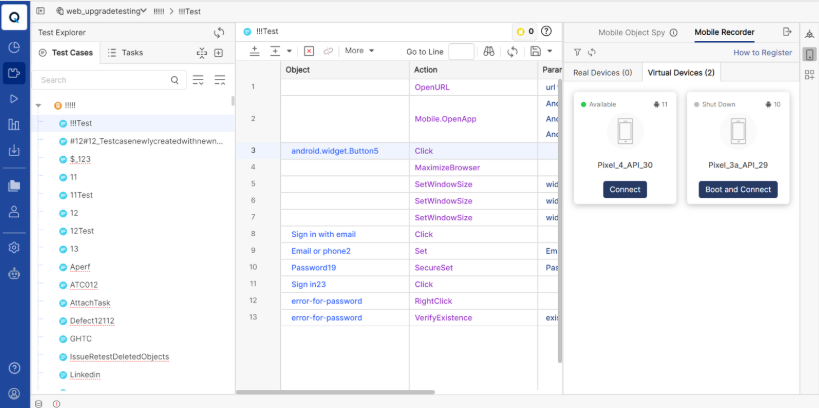
Once the pre-requisites are verified, you will see all the installed devices. Select the device and click Boot & Connect.
This will open the Emulator and the Mobile Application Configuration screen with the following fields:
Select an Application: To launch an already installed application, select it from the dropdown list.
Install new application: To install an application, select the .apk file from your local directory and click Install. It will be added to the Select an Application dropdown list.
Provide Web URL: To add objects from web, input the Web URL.
Advanced options: To add capabilities, select a capability from the dropdown.
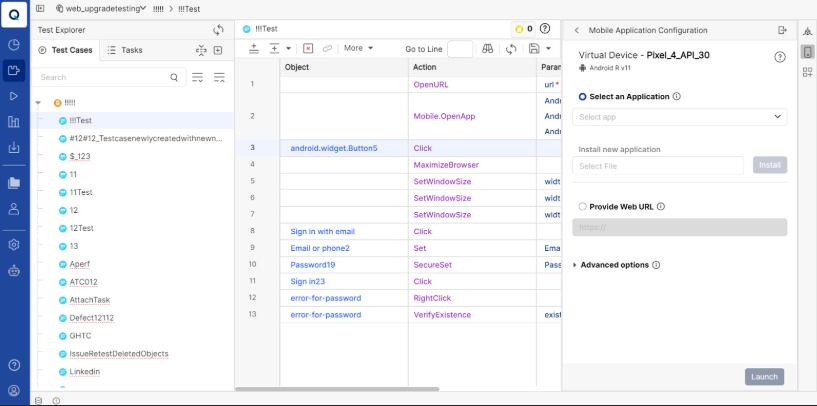
Click Launch to launch the device.
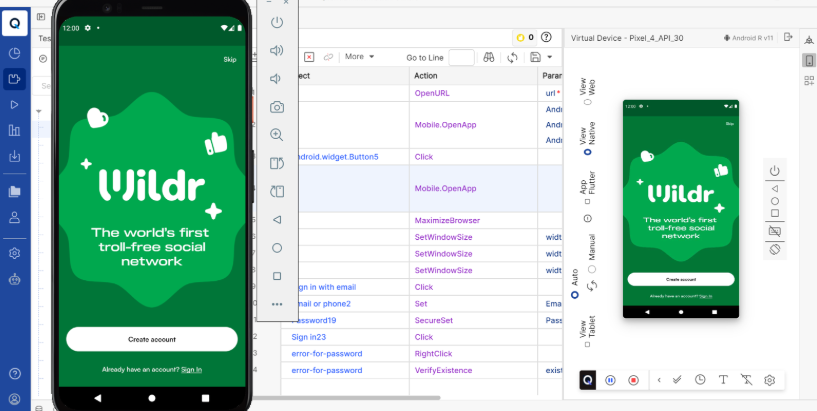
Use the Recorder Toolbar.
Once the browser launches, a small recorder toolbar appears. This toolbar can be moved around the screen as per your convenience.
Using this toolbar, you can:
Pause Recording: Temporarily halt the recording session.
Stop Recording: End the recording and close the browser session.
On the Advanced Toolbar options, click the Expand icon in the toolbar to access additional features. Some of the advanced options include:
Capture Verify Actions: It will capture the verify actions.
Capture Wait Action: It will capture the wait actions.
Enable Set Text: Record specific keystrokes interactions with the application.
Disable Set Text: Disable the Set text option.
Locator Type Priority: Set locator priority for the object. By default, the locator type sequence is:
UiAutomator
ID
Accessibility ID
Class
XPath
Once all the necessary steps are captured, click Stop Recording.
Recorded steps now become visible in the Test Editor.
You can then proceed to save, edit, or run the recorded test case.