Update Windows Installation
Update QAS - Server
Download the latest build of QAS from the provided link.
Copy and paste the QualitiaAutomationStudio-9.x.x.zip file into the following path:
C:\ProgramData\Qualitia Automation Studio - Server\installerUpdates.When an update is available in the folder, the QAS Server portal will display an Auto-Update banner with the message, Qualitia Server 9.x.x available, and an Update button.
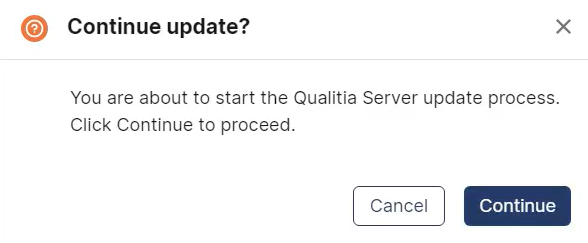
Click Update to proceed. You will be prompted to confirm your consent to update.
Click Continue to proceed; otherwise, click Cancel.

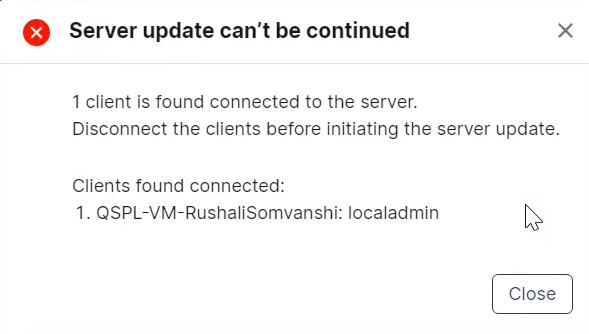
If any Qualitia clients are connected, a notification will show which clients are still active. The server cannot be updated until all clients are disconnected.

If no clients are connected, you are redirected to the Update in Progress… screen, where you can monitor the update progress, including an estimated completion time.
Once installation is complete, you are directed to the Setup screen on the QAS Server portal to finalize the update.
In the event of a failure during the update process, the Updates folder, which is backed up prior to the start of installation, will be restored automatically. This ensures that no data is lost, and the system is reverted to its pre-update state.
Update QAS - Client
After the server is updated, double-click on Qualitia - Client.
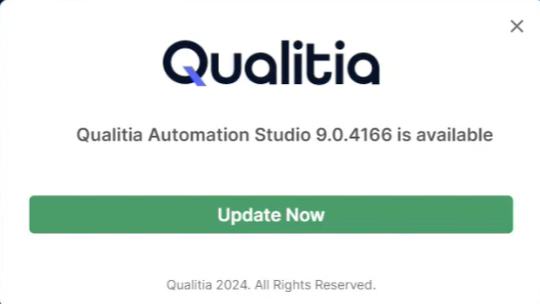
When the update popup appears, click Update Now to initiate the update process.

The necessary files for the client installation will start downloading, with a progress bar showing the download status.
Once the files are downloaded, a message will appear “Please wait while Windows configures Qualitia Automation Studio - Client”.
You will also see a progress bar that indicates:
The configuration
Getting requirements
Removing the older version
If the update fails, an error message popup will appear. Resolve the error, then relaunch Qualitia - Client to restart the update process.
Rollback Process
Note: Ensure a backup of the workspace folder from Qualitia Automation Studio - Server is taken before the upgrade; otherwise, rollback may result in data loss.
Steps for Rollback:
Uninstall Qualitia Server:
Go to Control Panel > Programs and Features, select Qualitia - Server, and uninstall.
Uninstall Qualitia Client:
In Control Panel > Programs and Features, select Qualitia - Client and uninstall.
Delete Server Folder:
Navigate to
C:\ProgramData\Qualitia Automation Studio – Serverand delete the Qualitia - Server folder.
Delete Client Folder:
Go to
%localappdata%and delete the Qualitia Automation Studio – Client folder.
Install Previous Qualitia Server Version:
Install the previous version of Qualitia - Server from your saved setup files.
Stop the Qualitia Web Service:
Open Services (
services.msc), find qualitia-web-service, and stop it.
Delete Current Workspace Folder:
In
C:\ProgramData\Qualitia Automation Studio – Server, delete the workspace folder.
Restore Backup of Workspace Folder:
Copy the previously backed-up workspace folder into
C:\ProgramData\Qualitia Automation Studio – Server.
Restart the Qualitia Web Service:
Go back to Services, find qualitia-web-service, and start it.
Download and Install Qualitia - Client:
Go to the Qualitia portal, download the Qualitia - Client, and install it.
Launch Qualitia - Client:
Open the Qualitia - Client, navigate to the Develop tab, and allow the project to download.
🔧 Got a problem? Let’s fix!
Another version of QAS Client already exists.
Remedy: In case of an existing version corrupted, clicking on the QAS client installer located in the server workspace > updates > clients > windows folder, you will be prompted to either repair or remove the existing version.
To Repair, click Repair icon.
After clicking on Repair, you will see a progress bar.
Once done you will see a finish screen, click Finish to close the installer.
To uninstall, click Remove icon.
Click Remove button. You will see a progress bar indicating the uninstallation.
Once removed you will get a confirmation message that Qualitia Automation Studio 9.x.x is uninstalled successfully.
If you are not sure on the action and you don’t want to perform any actions, click Cancel.
To go back to the previous screen, click Back.
In the scenarios where the user needs to connect QAS client to multiple QAS Servers and one of the Servers got updated and the other one in old version. The client will not connect it will display an error window with a message.
📞📚 Here to Help: Support and Resources
If you have questions that are not addressed in the documentation, you may raise them here in the Qualitia Community.
