Environment Variables
Qualitia Automation Studio (QAS) allows adding environment variables to use any particular parameter multiple times during the course of the project. Once added, user can use these variables to add static or parameterized data for test case developments. This reduces hassle of adding the same parameter multiple times and saves time when developing test cases.
Earlier, Qualitia supported only a single default environment variable set, which limited flexibility during test executions. With the latest update, multiple Environment Variable Sets are now supported. This enhancement enables users to create, manage, and assign different environment sets based on execution requirements — offering greater control, reusability, and efficiency in managing test configurations.
You can now execute test cases from the Editor, Debugger, and Suite using either the default or any custom Environment Variable Set.
Key Features of Environment Variable Sets
Introduction of Multiple Environment Variable Sets
You can create multiple environment variable sets to cater to different test environments.
Each set can have its own set of variables, improving modularity and reducing redundancy.
Managing Environment Variable Sets
You can create, edit, clone, and delete environment variable sets efficiently.
A new edit option allows direct modification of environment sets.
You can export environment sets for better portability across projects.
Enhanced User Experience
You can expand or collapse environment sets using intuitive UI controls.
Clicking on the edit button directly opens the respective environment set page in the settings tab.
Multi-User and Project Privileges
Multiple users with the right project privileges can now access and use the same environment variable sets.
Users can create new environment variables within a set using the ‘+’ button in the environment set UI.
These Environment Variables are project specific, and each project shall have its own set of variables. These variables can be used across tasks and test cases in a particular project.
📚Prerequisites
User should have the QAS client installed.
Projects should have been created.
Managing Environment Variables
Create an Environment Variable Set
Log in to QAS - Client.
Navigate to the Environment Variable menu:
Access Project Management from the left navigation of the QAS - Client. Select the project and click Configuration.
Access Settings from the left navigation of the QAS - Client. On the Settings screen, select Project Configuration.
Expand Project Configuration and click Environment Variable.
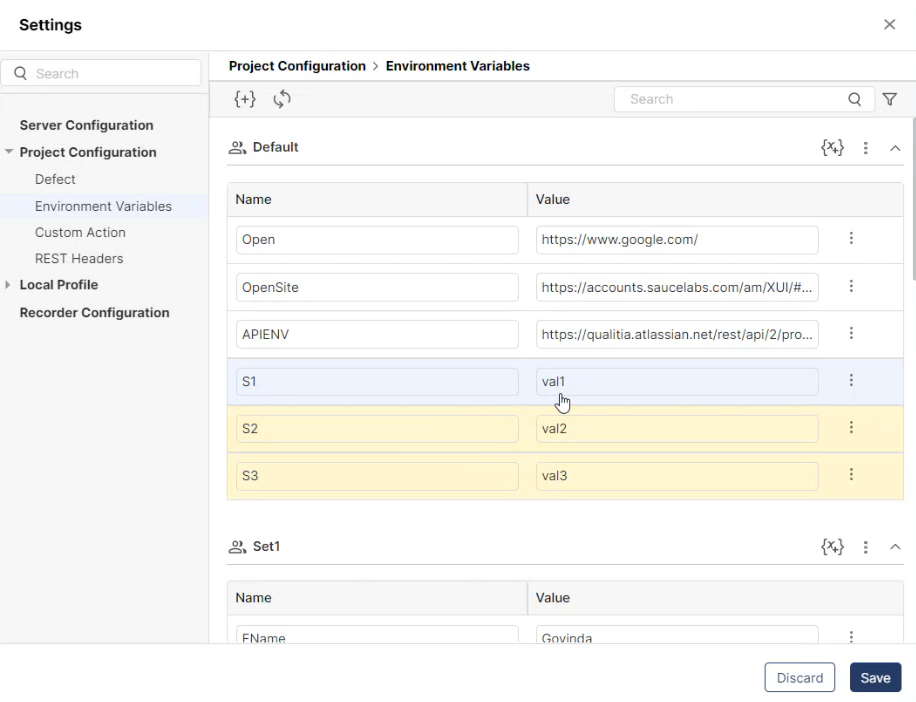
When the Environment Variable page is opened for the first time, the Default Environment Set will be visible in expanded mode with an empty environment variable row.
Note: The Default set is a shared set by default, and its values are accessible to all users. It is always denoted by ( ) symbol.
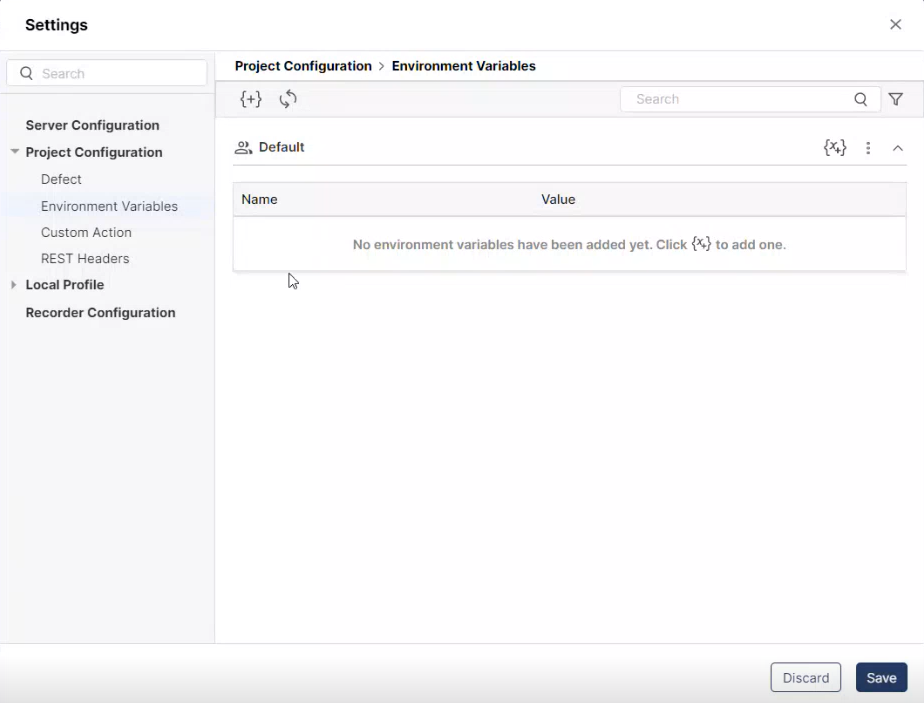
Enter Name and Value if you want to add an environment variable to the default set.
To create a new environment set, click + icon. It will open the Create Environment Set popup window.
Enter Name and click Create; if you don’t want to save the set click Cancel.
Note: All the newly created set will initially be a local set, accessible only to the user who created it. It is indicated by the Local set ( ) symbol.
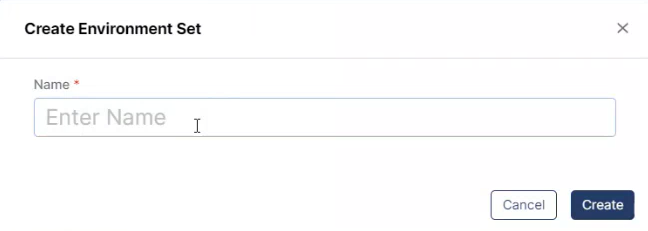
Once you have created the environment set, you can now add the environment variable to it by entering the Name and Value.
Note: You can add multiple environment variables to each set.You will see the list of environment variable sets along with its added variables and values.
Click Save to continue; otherwise, click Discard.
Edit an Environment Variable
You can edit an environment variable by double-clicking the value field or name field.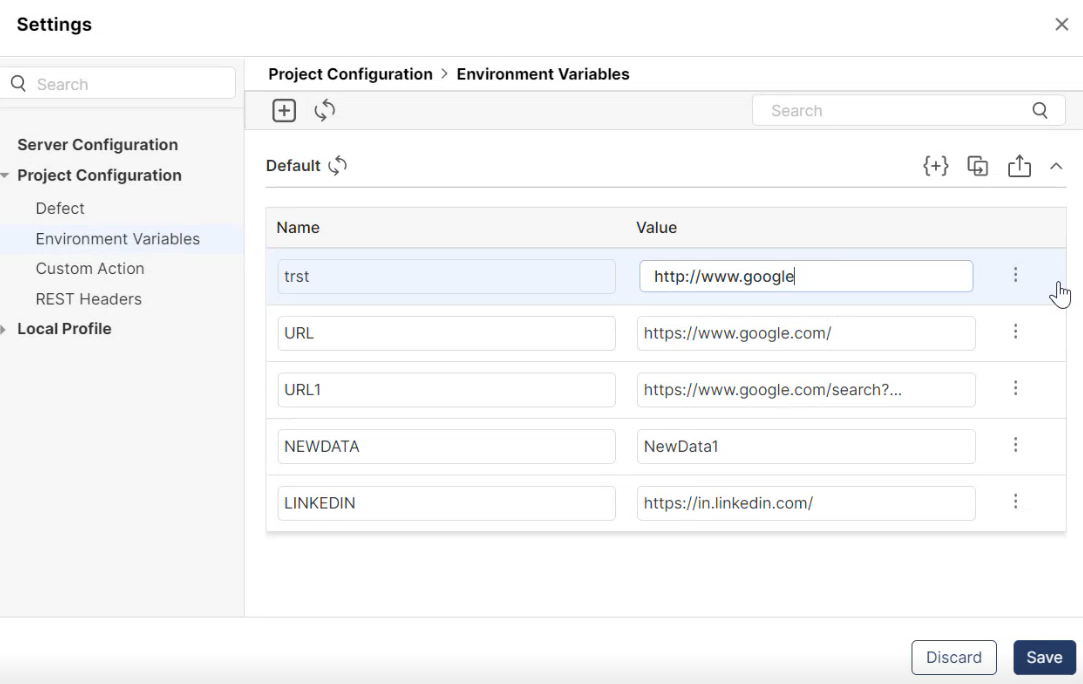
Delete an Environment Variable
Hover over the three dots next to value and click Delete to delete the environment variable.
If an Environment Variable Set is locked by a user, other users cannot add new variables to it. A lock icon appears next to the EV Set name to indicate it is locked.
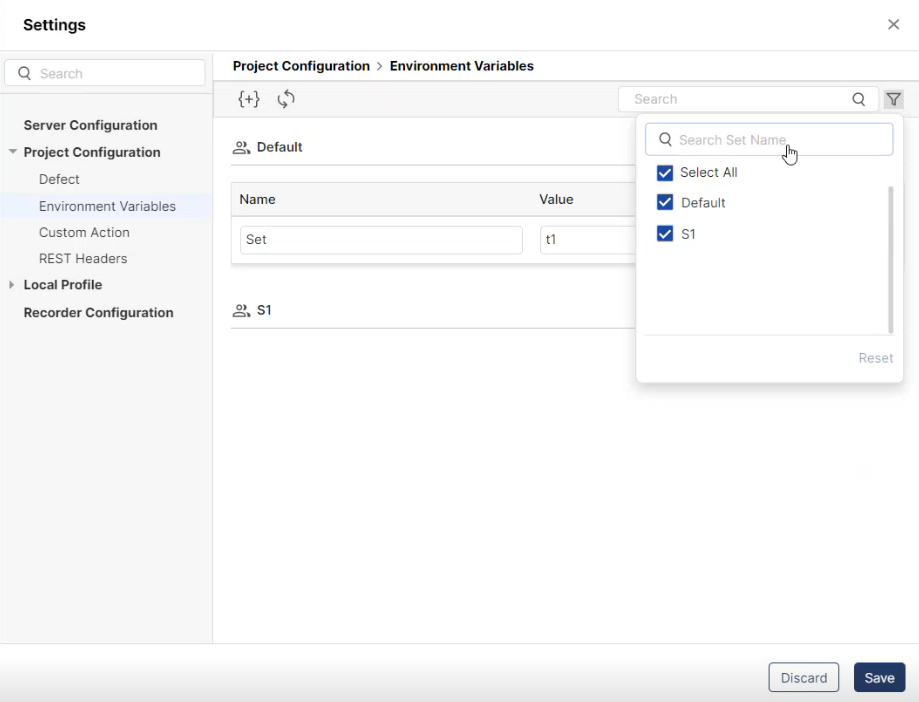
You can filter by one or more environment sets. By default, all environment sets are selected. The search results will include only rows from the selected sets.
Publishing Local Sets
All newly created environment sets are local by default, accessible only to the user who created them. These are indicated by the (![]() ) symbol.
) symbol.
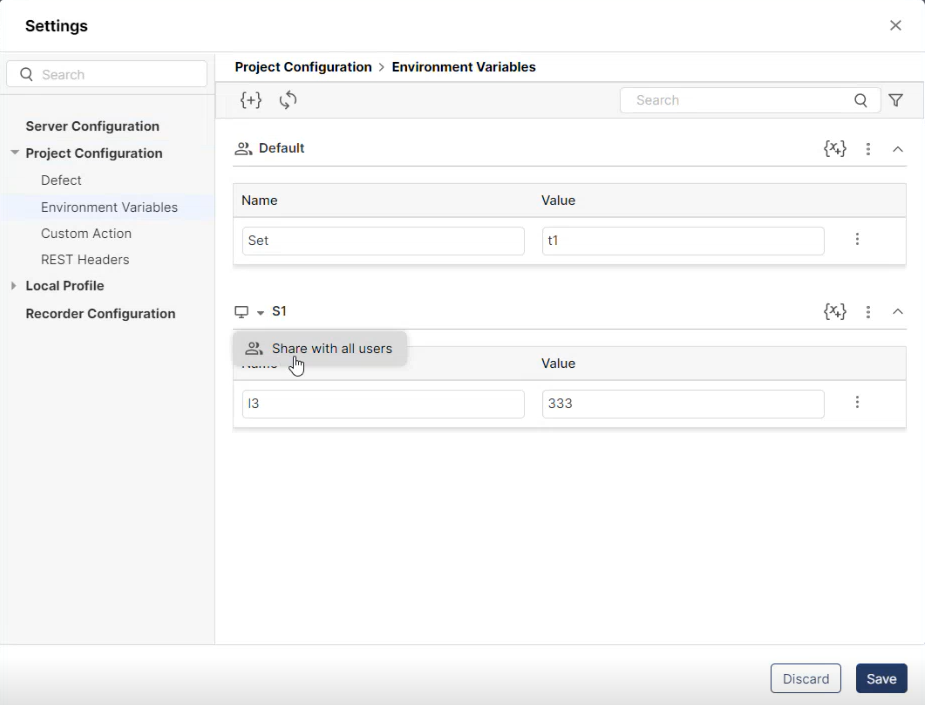
To publish a local environment set and make it accessible to all users:
Go to the environment set you want to publish and click Share with all users.
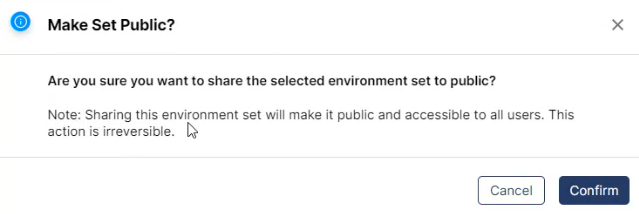
It will open Make Set Public pop-up window, click Confirm to continue or Cancel to abort.
Click Save to apply the changes.
Once published, the set becomes a shared set and is indicated by the shared set (![]() ) symbol.
) symbol.
Rename an Existing Environment Variable Set
To edit the existing environment variable set
Log in to QAS - Client.
Navigate to the Environment Variable menu:
Access Project Management from the left navigation of the QAS - Client. Select the project and click Configuration.
Access Settings from the left navigation of the QAS - Client. On the Settings screen, select Project Configuration.
Expand Project Configuration and click Environment Variable.
On the Environment Variable window, you will see the list of environment sets.
Go to the environment set you wish to edit and click the three-dot menu next to the set.
Select Rename, as shown in the screenshot below:

It will open Edit Environment Set popup window, where you can edit the name of the environment set.
Click Save to save the changes; else, click Discard.
Delete an Environment Variable Set
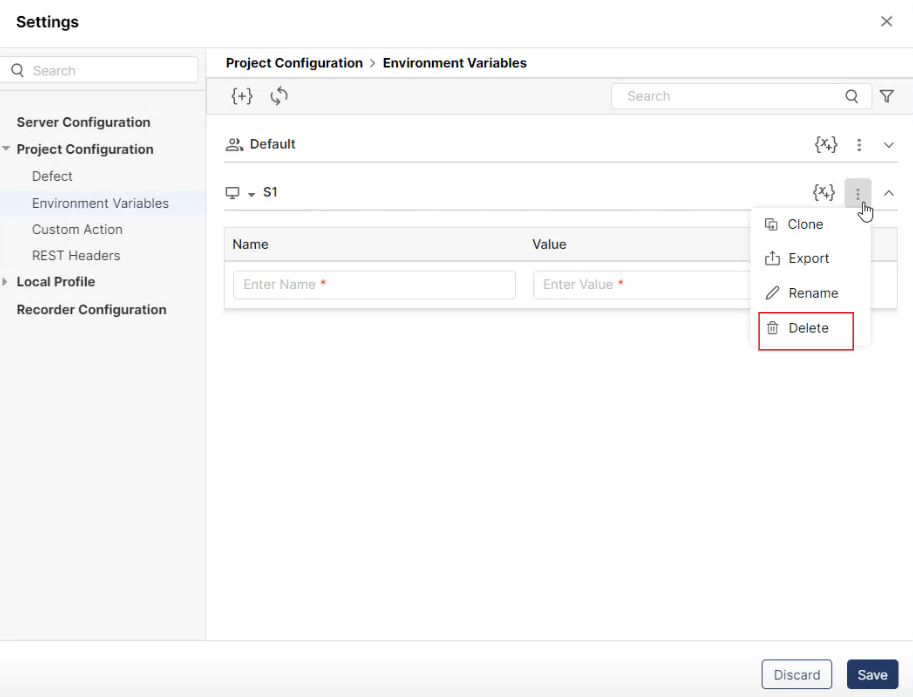
To delete an environment variable set, click the three-dot menu next to the set, and then select Delete, as shown in the screenshot below:
If an environment variable is associated with a test case or suite, you won’t be able to delete it.
Clone an Existing Environment Set
To clone an environment variable set, click the three-dot menu next to the set and select Clone, as shown in the screenshot below:
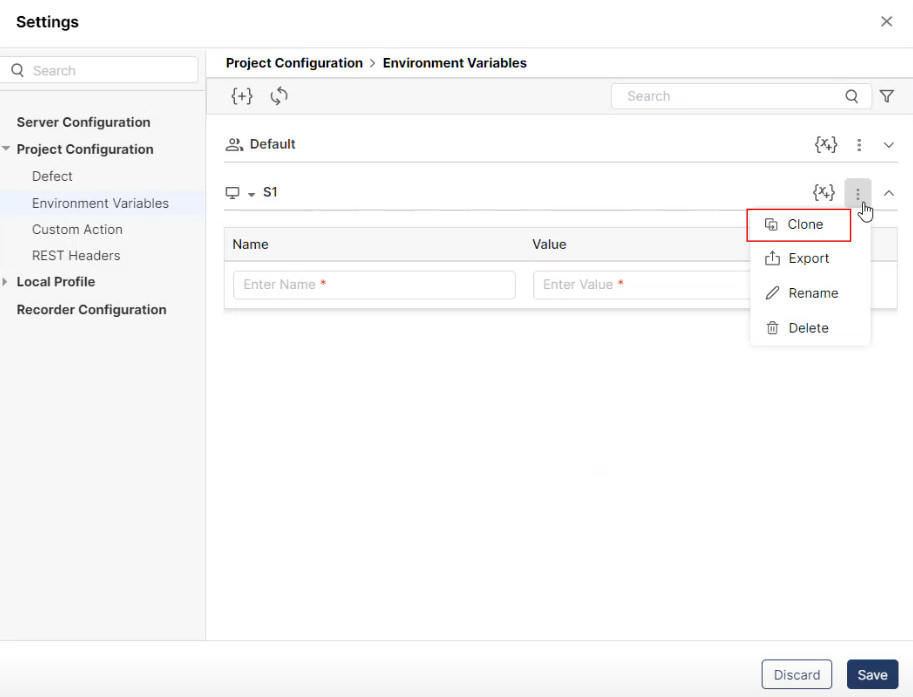
All environment variables within the selected set will be copied to the new set.
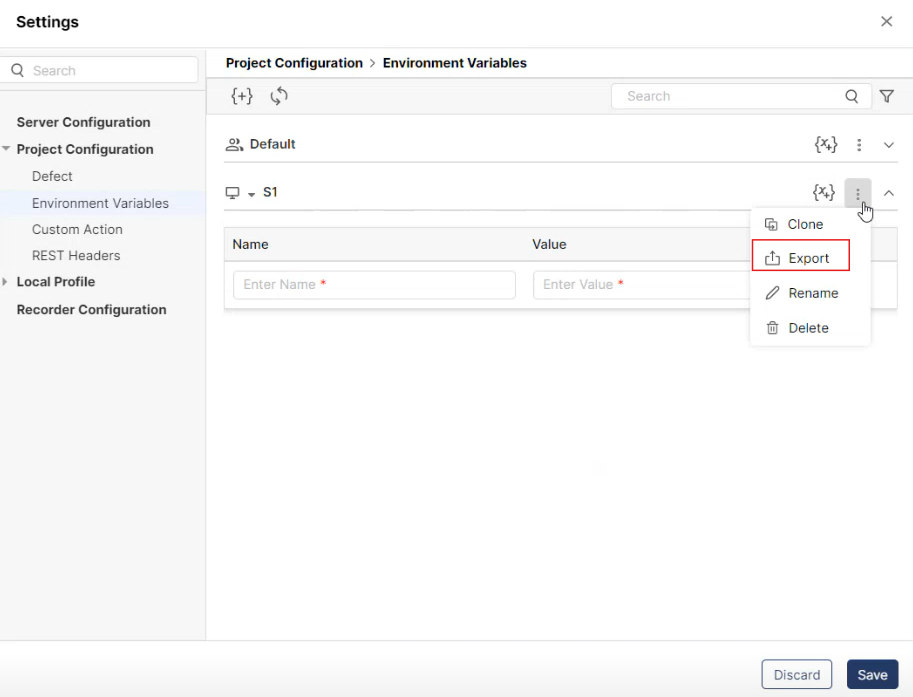
Export an Existing Environment Set
To clone an environment variable set, click the three-dot menu next to the set and select Export, as shown in the screenshot below:
Import Environment Variable from Another Set
The Import from Another Set feature allows you to reuse environment variables from one set into another, eliminating the need for manual duplication.
This option is available from the three-dot menu (⋮) associated with each environment set on the Environment Variables settings screen.
Importing is allowed only if you have edit permissions on the target environment set. If not, the set appears in a locked (read-only) state and the import option is disabled.
Steps to Import Environment Variables from Another Set
Navigate to the Settings > Environment Variables screen.
Locate the target environment variable set where you want to import values.
Click the three-dot menu (
⋮) for that set.From the dropdown menu, click Import from Another Set.
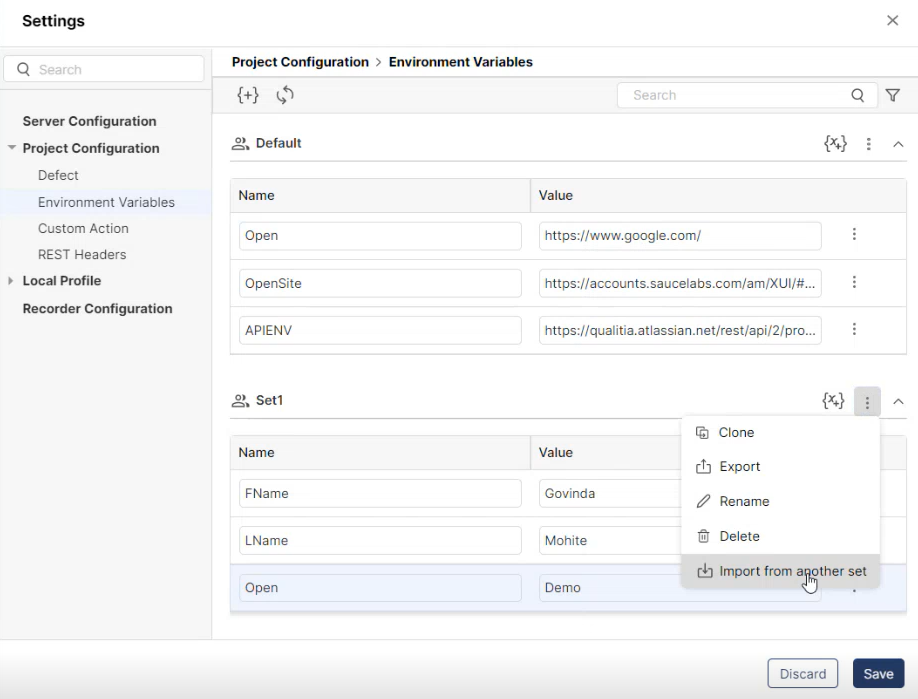
Note: If no other environment sets are available, this option will be shown in a disabled state.
A pop-up window titled Import from Another Set appears, where all available environment sets in the project will be displayed as a radio button list.
Note: You can select only one source set at a time.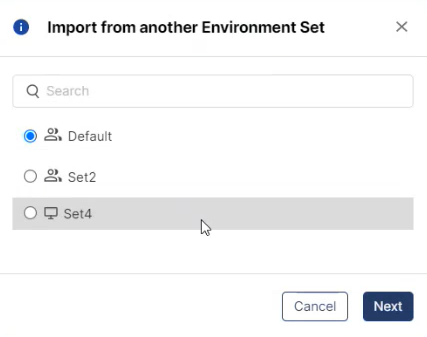
A search box is provided to quickly find a set by name.
Click Next to proceed.
A confirmation screen titled “Import from Another Environment Set” appears with a message and a table displaying details of duplicate environment variable names.
Note: The table is shown only when environment variable name is duplicate, and value is different.
A table lists the following details:
Name: The name of the environment variable that will be overridden.
Current Value: The existing value in the current environment set.
New Value: The value from the selected environment set that will replace the current value.
Each row has a checkbox to allow selective import of individual variables.
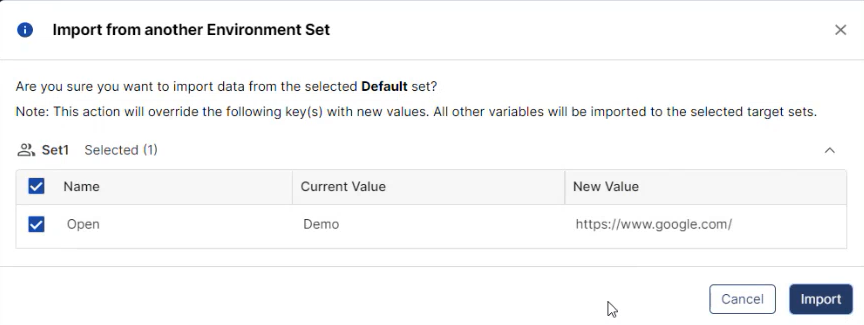
Click Import to confirm.
The selected variables will be imported:
Overwritten values and newly added keys will be highlighted.
Note: Highlighting remains until the you click Save, confirming the operation.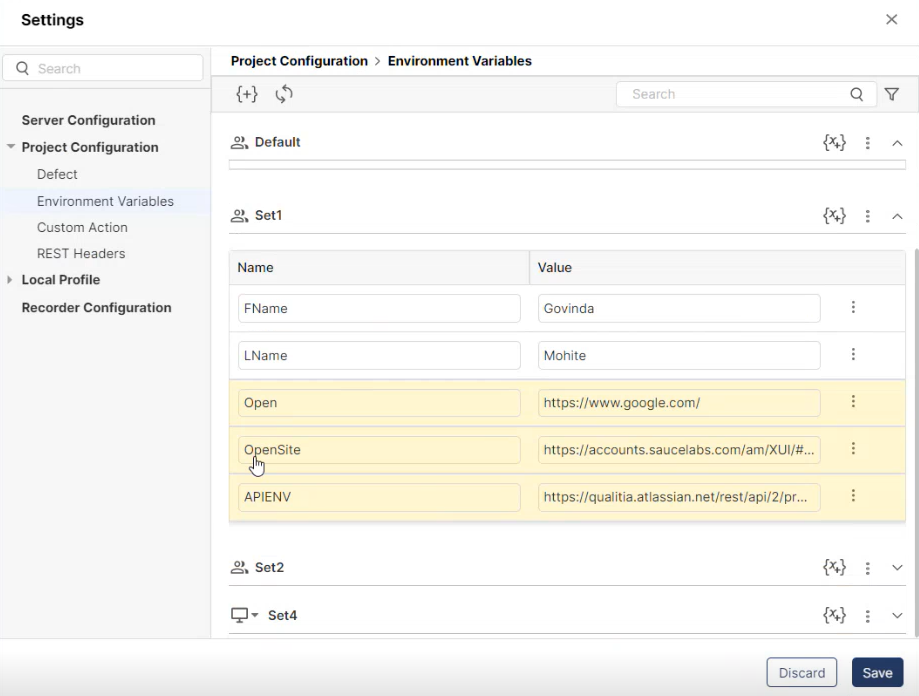
Click Save to finalize the import.
The yellow highlights will be removed, completing the import process.
If you do not have edit permissions for the current environment set, the Import option will be disabled, and the set will appear as locked.
Copy an Environment Variable to Another Set
The Copy to Another Set feature allows you to quickly replicate one or more environment variables from the current environment set into one or more existing sets.
Steps to Copy Environment Variables to Another Set
Navigate to the Settings > Environment Variables screen.
Locate the target environment variable set where you want to copy values.
Select one or more key-value rows. Use Shift+Click for multi-selection.
To copy the variable:
Right-click and choose Copy to Another Set from the context menu.
ORAlternatively, use the three-dot menu (
⋮) next to a variable to copy a single variable
A pop-up window titled Copy to another Environment Set appears listing all available environment sets (local and shared).
Note: Locked sets will be disabled, shown with a lock icon and tooltip explaining who has locked them.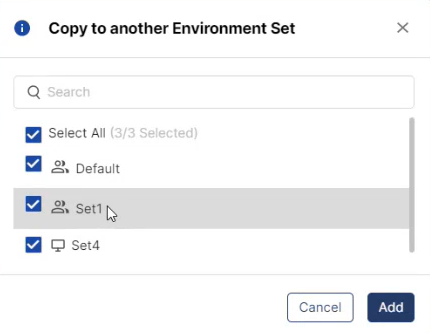
You can:
Select individual sets.
Use the Select All checkbox to choose or deselect all unlocked sets.
Click Add to proceed.
Note: When copying environment variables, keys that already exist in the target set will be overwritten, while new keys will be added.A confirmation screen titled “Copy to another Environment Set” appears with a message and a table displaying details of duplicate environment variable names.
Note: The table is shown only when environment variable name is duplicate, and value is different.
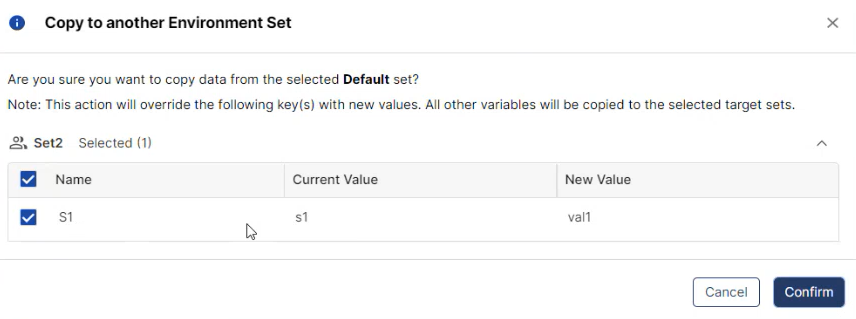
A table lists the following details:
Name: The name of the environment variable that will be overridden.
Current Value: The existing value in the current environment set.
New Value: The value from the selected environment set that will replace the current value.
Each row has a checkbox to allow selective import of individual variables.
Click Confirm to proceed or Cancel to abort.
Newly added or updated key-value pairs in each target set will be highlighted.
These highlights remain until you click Save.
If no environment sets exist, the Copy to Another Set option will be disabled.
Copying and pasting empty environment variables is also supported.
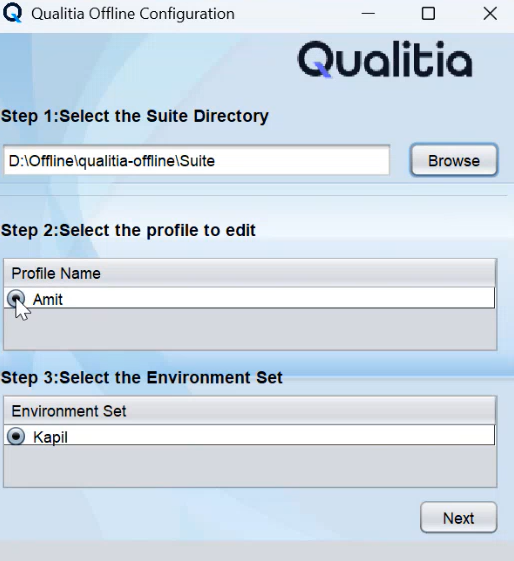
Offline Execution
When you export a suite for offline execution of a test case, you need to select the environment variable set along with the execution profile.

After exporting a suite, when you navigate to the Configuration Manager to configure the suite, the exported Execution Profile and Environment Variable Set will be displayed.
Note: The Execution Profile and Environment Variable Set cannot be changed from the Configuration Manager. To apply a different Environment Variable Set, you must export the suite again with the desired set selected.